News: Article #3 Now Published on Domino

My third article has been published over on Domino magazine, and I’d love for you to take a look (click here). Here’s a sneak peek:

Chapel-Hill-Powder-Room-After-1powder room in Chapel Hill, photo by me

White, black, and gold – how perfect for 2016!

Here’s my first article and my second article if you haven’t already read them.

Uptown: A Look at my Powder Room

I haven’t posted any photos of my home for quite some time. Most of the major work is done (yay!), although I always have something on my to do list (e.g., my basement bathroom). I am so proud of all that I have accomplished in the 1.5 years since I moved into my home. The house looks nothing like it did when I moved in. I slathered gallons and gallons of paint on every single wall, changed a bunch of light fixtures, cleaned for hours on end, tore down a wall, and so much more.

I haven’t taken after photos of every room, so this past weekend, I devoted some time to doing just this. I am just about ready to share a house tour. I really should post the before photos, too, to make things extra dramatic (maybe I will one day)!

For now, here’s a look at what my powder room. This space was completely gutted, and nothing (besides some of the walls) was salvageable (you can see some before photos here and here). It was a disgusting space, really, and that just sums up the before.

White-Cabana-Powder-Room-1 White-Cabana-Powder-Room-2 White-Cabana-Powder-Room-3 White-Cabana-Powder-Room-4 White-Cabana-Powder-Room-5I am so pleased with how this little room came together. Me and my family did the work ourselves, so the only cost was for supplies and fixtures. Little money, big impact. I especially love the floor in my powder room because I installed it myself. Who knew I would ever do such a thing!

Sources:
Tommy faucet – Delta c/o
cabinet & sink – IKEA
hex tiles – Twin City Tile
twin flush, energy efficient toilet – Costco
vintage Chanel poster – Les Puces flea market, Paris
mirror – HomeSense
towel bar – Umbra (it’s a paper towel holder)
linen towels – vintage
milk glass – vintage
light fixture – vintage
toilet roll holder – Bed Bath & Beyond
baseboards, light plates – Home Depot

Photos by me.

Uptown: Grouting Tiles

I’m pleased to announce that I have now completed the tile work in my powder room. I ordered the grout – smoke grey – from Twin City Tile and grouted the floor over the Thanksgiving long weekend. I am SO incredibly pleased with the floor and I am SO glad I decided to rip out the vinyl.

White-Cabana-powder-room-hex-tile

Grouting was easier than laying the tiles down. I was certainly less stressed about this part of the process. How did I get the job done? I followed the directions on the grout package as well as the instruction I received from the Home Depot tiling workshop I attended and the mini lesson I received from Silvano at Twin City Tile. I mixed the grout powder with water and stirred it all up (with a paint stick – it was a small batch so this was good enough) so it had the consistency of pudding or icing (tiling and grouting is just like icing a cake!). I used the spatula (grout spreader) and moved the grout into the spaces like I’ve seen on TV (honestly!). I let the grout dry for about 10-15 minutes and then spent quite a bit of time (over an hour maybe) cleaning the tiles very carefully. I knew I couldn’t leave any grout residue on the tiles otherwise my floor would be ruined. I spent so much time wiping the grout off with a damp sponge just as I had been taught (one direction, rinse the sponge after each wipe, etc.). It was time consuming but very satisfying. I then let the grout dry for a few days (I think it only needed 24 hours) before I actually stepped on the floor.

The room is almost done. Since the last powder room progress update I bought a new toilet (dual flush – so fancy) and a new mirror. I (and my handy parents) now just need to…

– sand the walls
– prime the walls
– paint the walls
– buy baseboards
– install baseboards
– install vanity (this one)
– install faucet (this one)
– install toilet
– install light fixture
– install mirror (from here)

And then the room will be ready for a big reveal!

Uptown: Powder Room Update

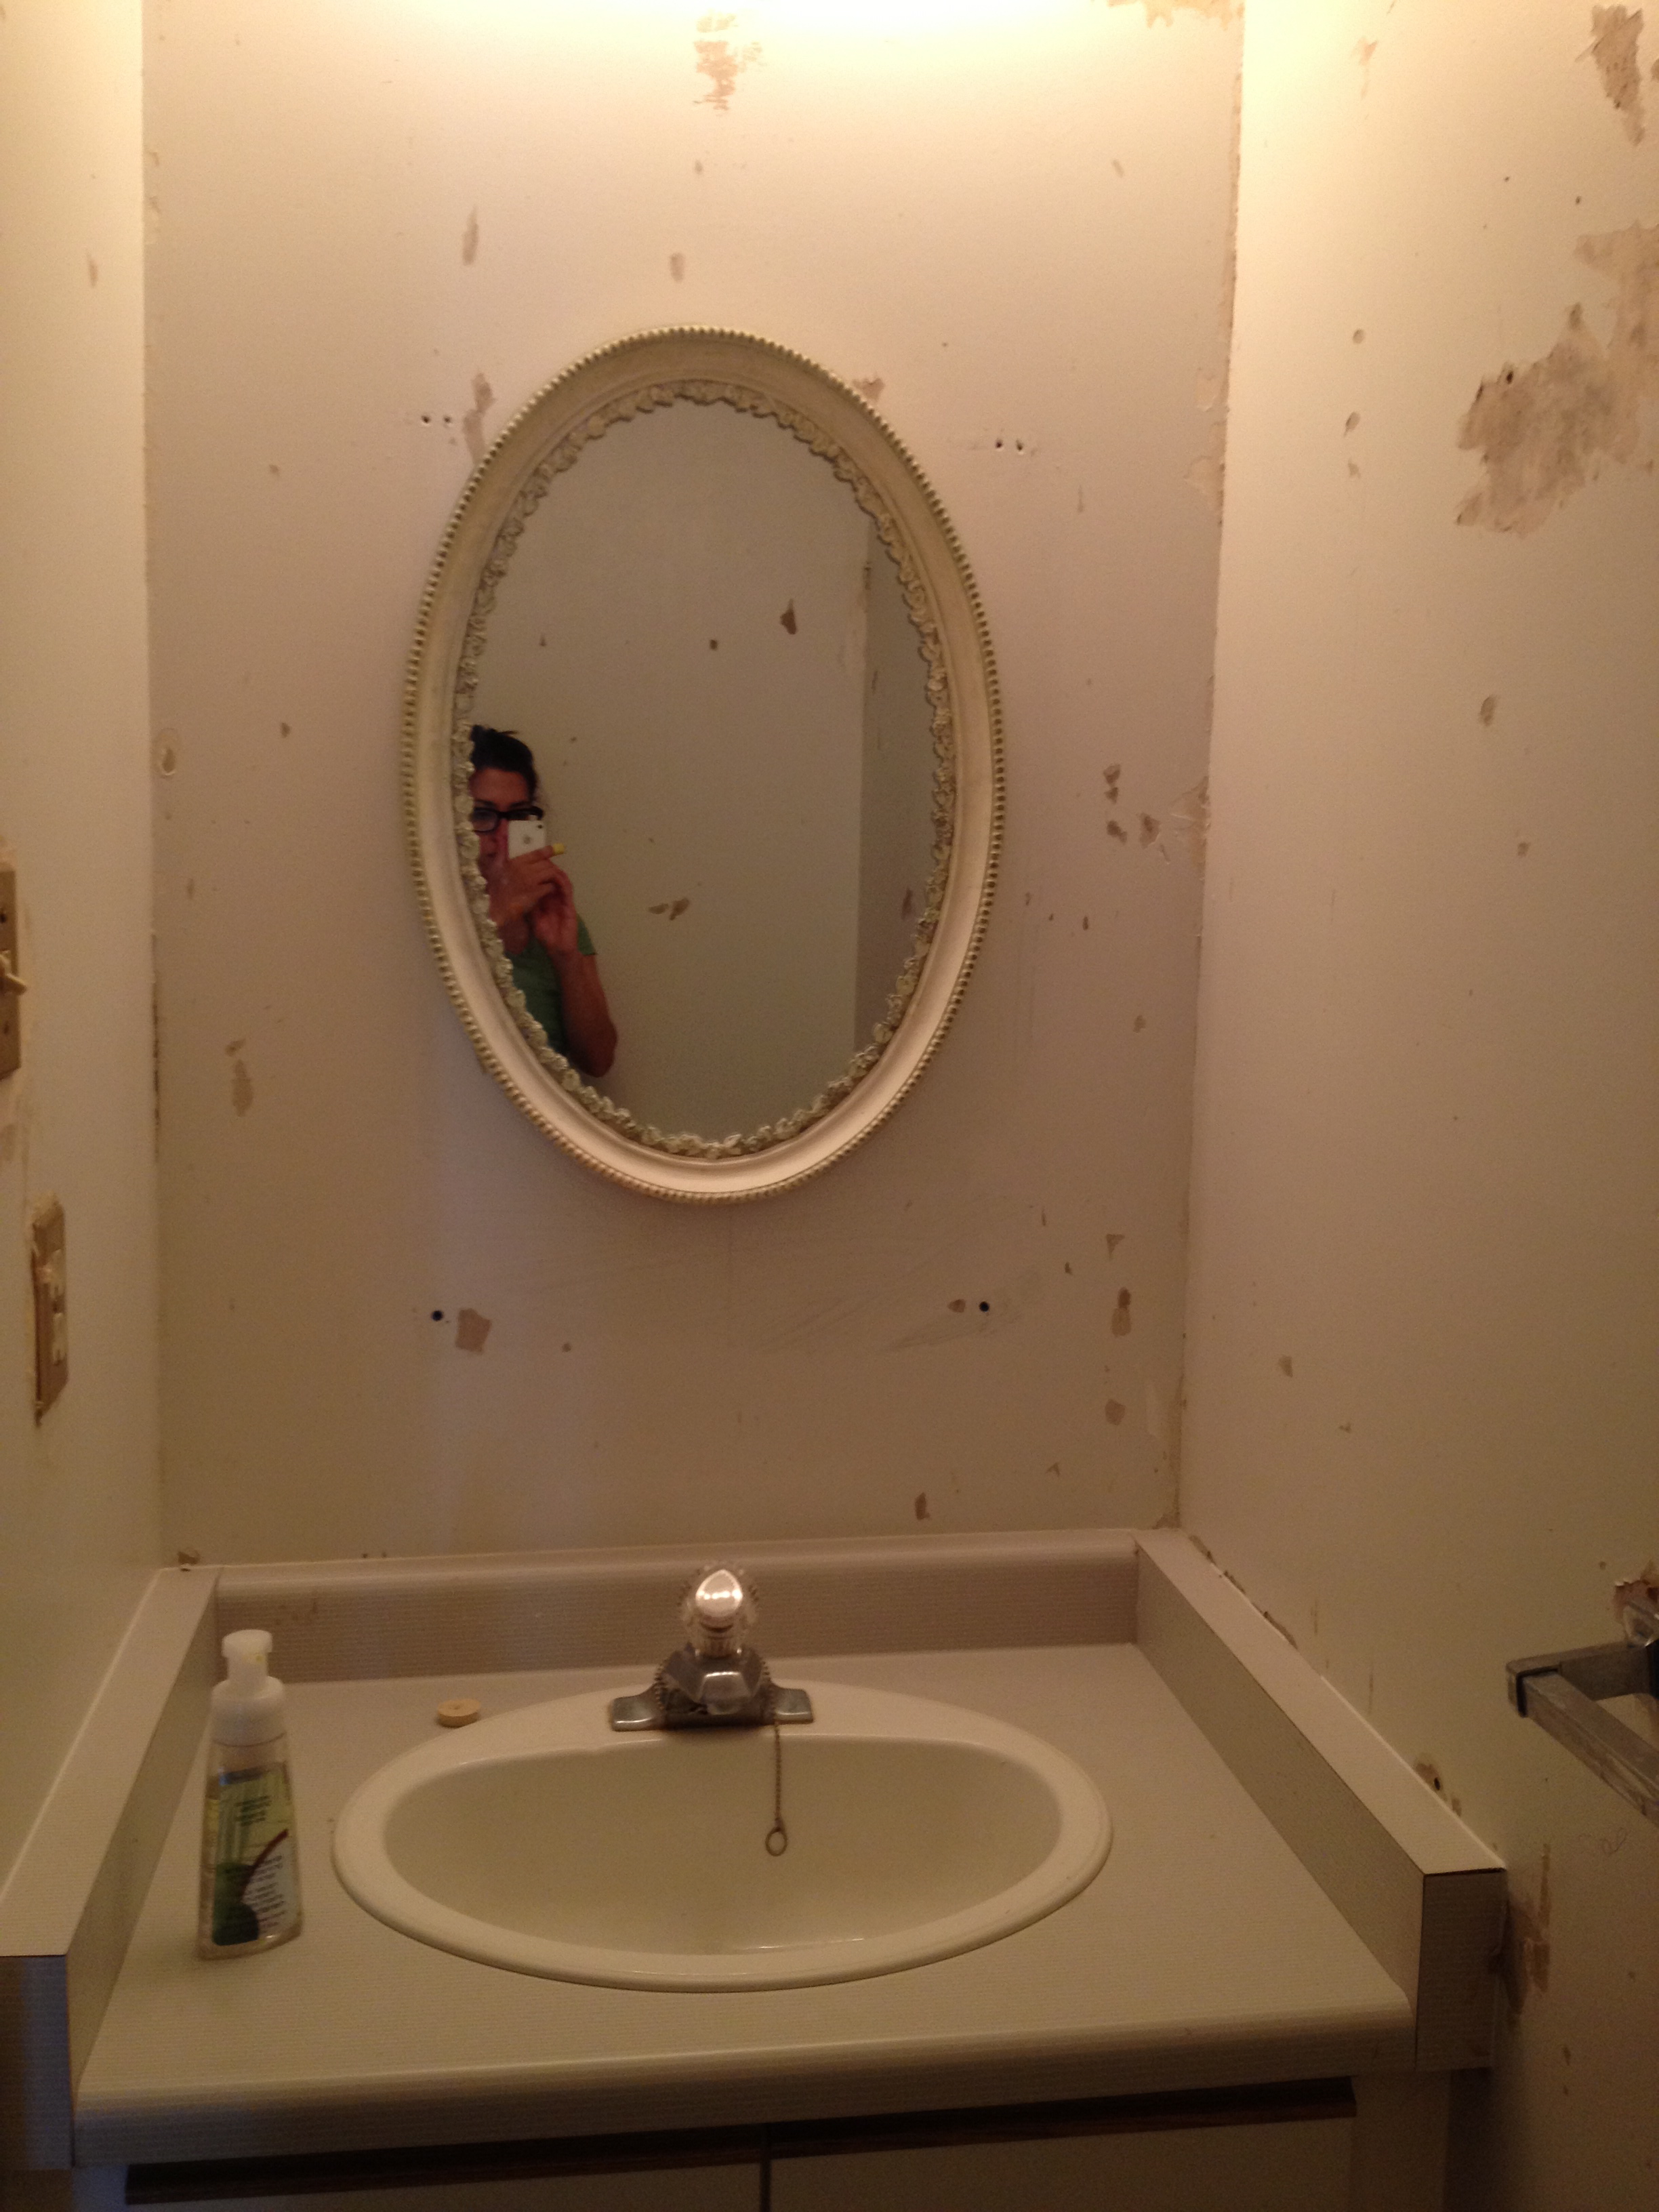
When I moved into my house, my plan for the powder room was to rip off the wallpaper and install a new faucet. Well, plans change.

IMG_5192_2

 powder room before

The powder room is now getting a full makeover. Oh, how I love a good makeover story! Progress has been slow but steady and I am really enjoying the full reno experience (minus the mess and constant clean up). To begin this makeover, I spent several evenings ripping down the wallpaper. Then I spent several more evenings (and weekends) scraping wallpaper glue from the walls.

IMG_5451

powder room – progress – wallpaper removed

It didn’t take me long to decide that I wanted a new vanity so at this point I handed the room off to my dad who, in addition to patching up a whole bunch of holes (thank you so much wallpaper glue) and rearranging the light source, removed the vanity and toilet. Once the room was empty, I decided that the vinyl flooring had to go so I ripped it out one Friday evening. I ripped it out without really planning what was going to come next but I was encouraged by a chat with Tia and a visit to Twin City Tile.

IMG_6226

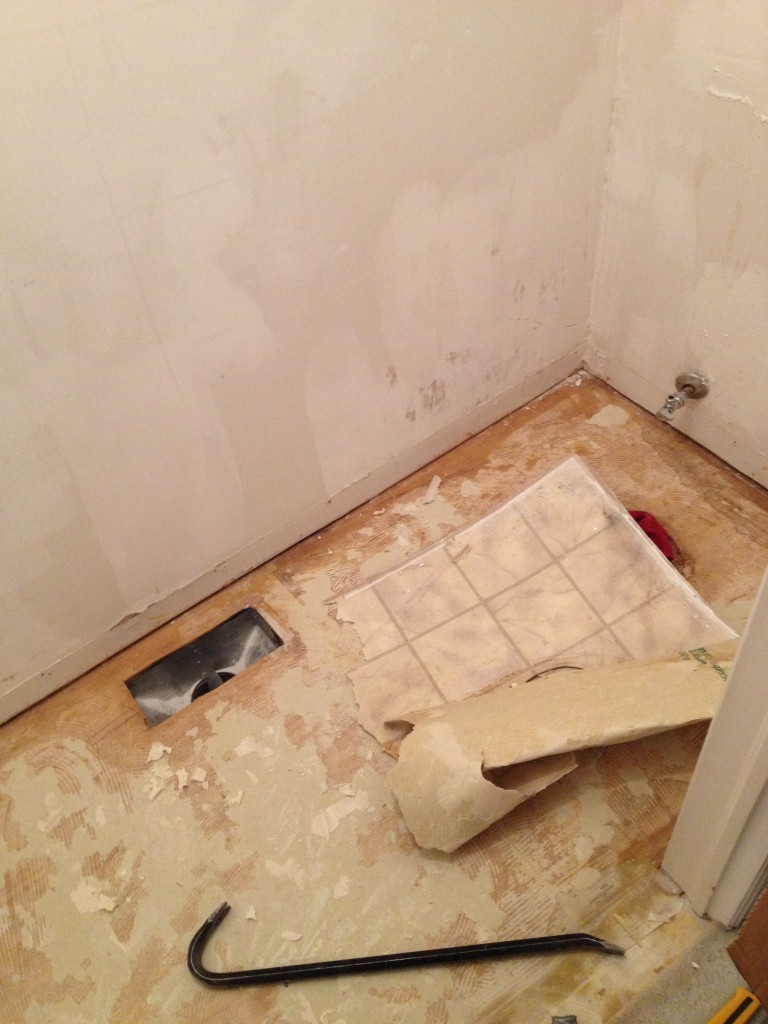
 powder room – ripping out the vinyl floor

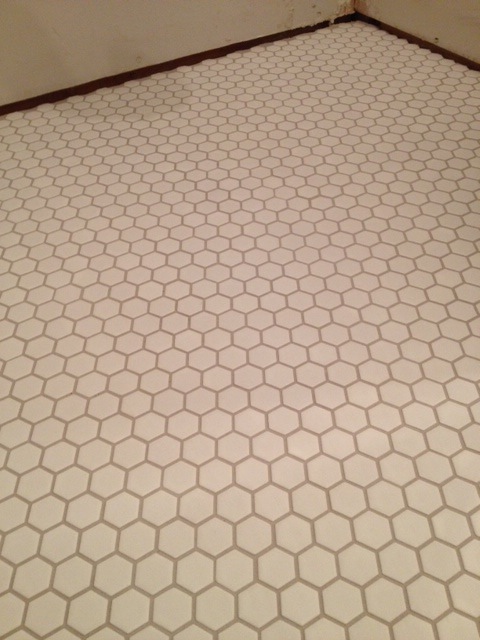
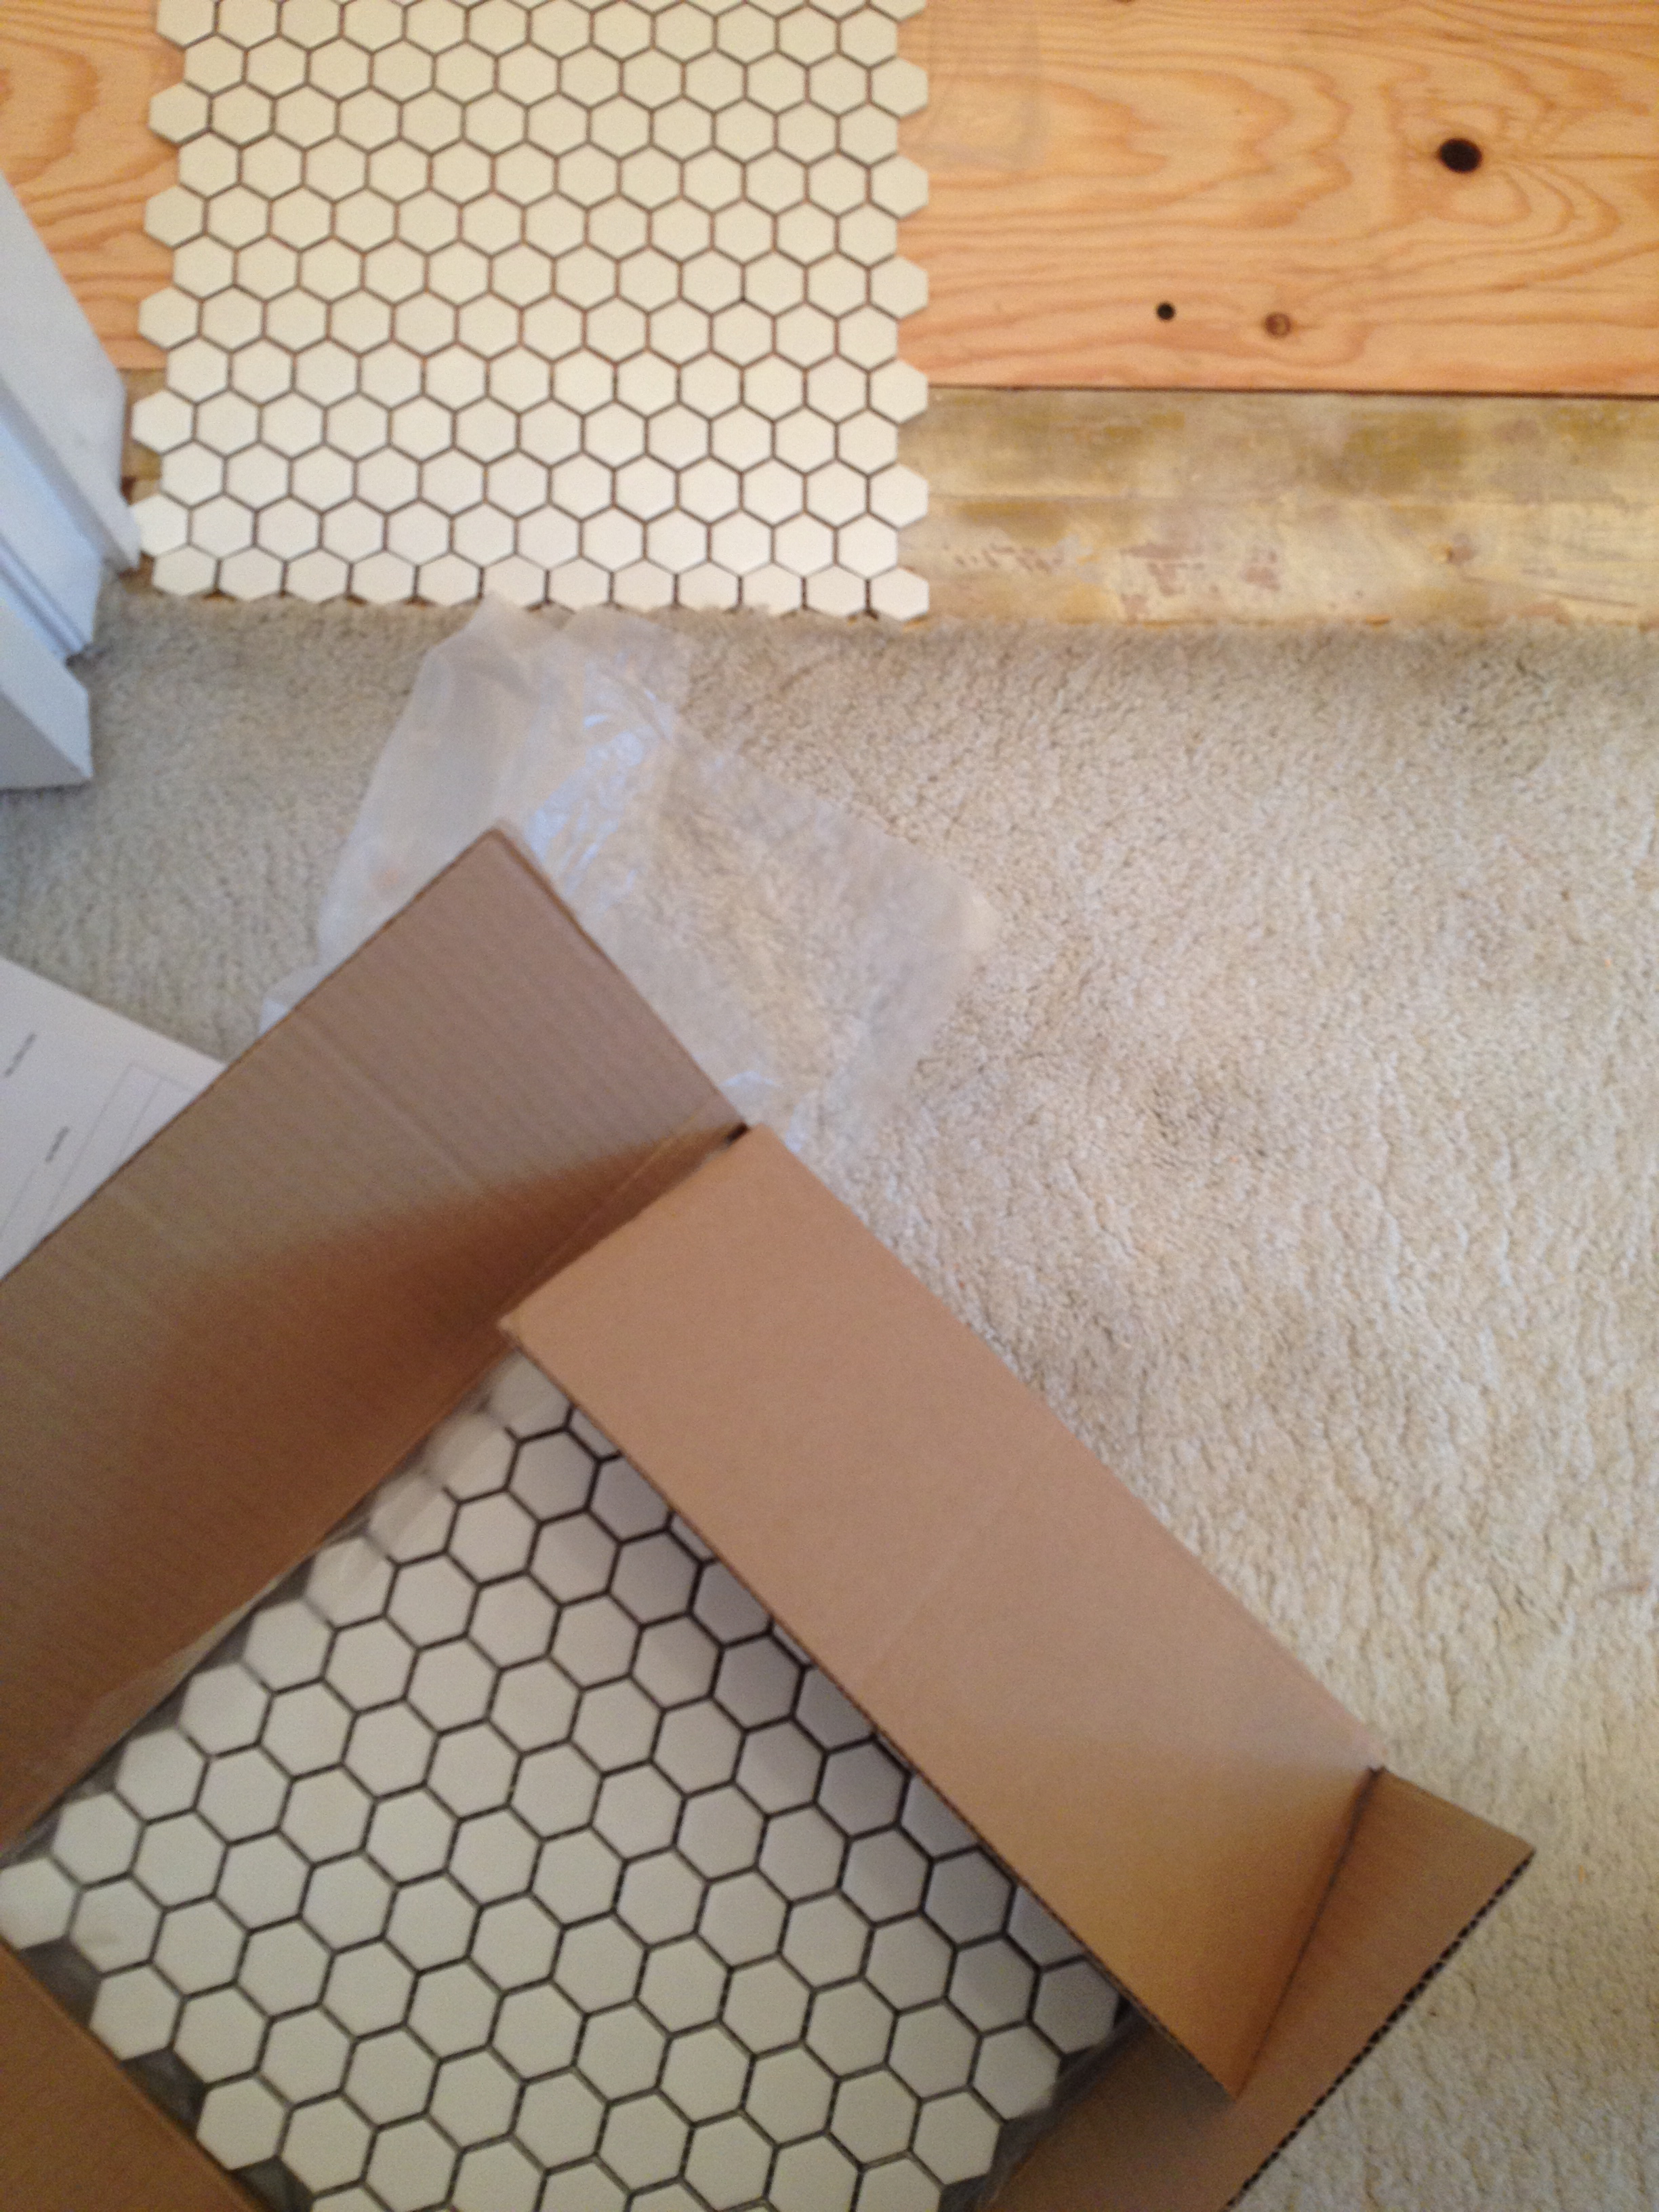
In between all of the destruction, I bought a new sink and vanity. I placed a tile order with Twin City Tile feeling only half-way confident that I could actually install a new floor by myself. After a mini-lesson from Silvano, I realized that I would need to install a new sheet of plywood over the subfloor in order to ensure a smooth installation of the new tiles. My dad and I cut a piece of plywood to size and the difference it made was pretty impressive. With the new flat floor in place, I went ahead and planned out the tile placement. I started with finding the centre point in the room and drawing lines to help line up my sheets of hex tile.

IMG_6270

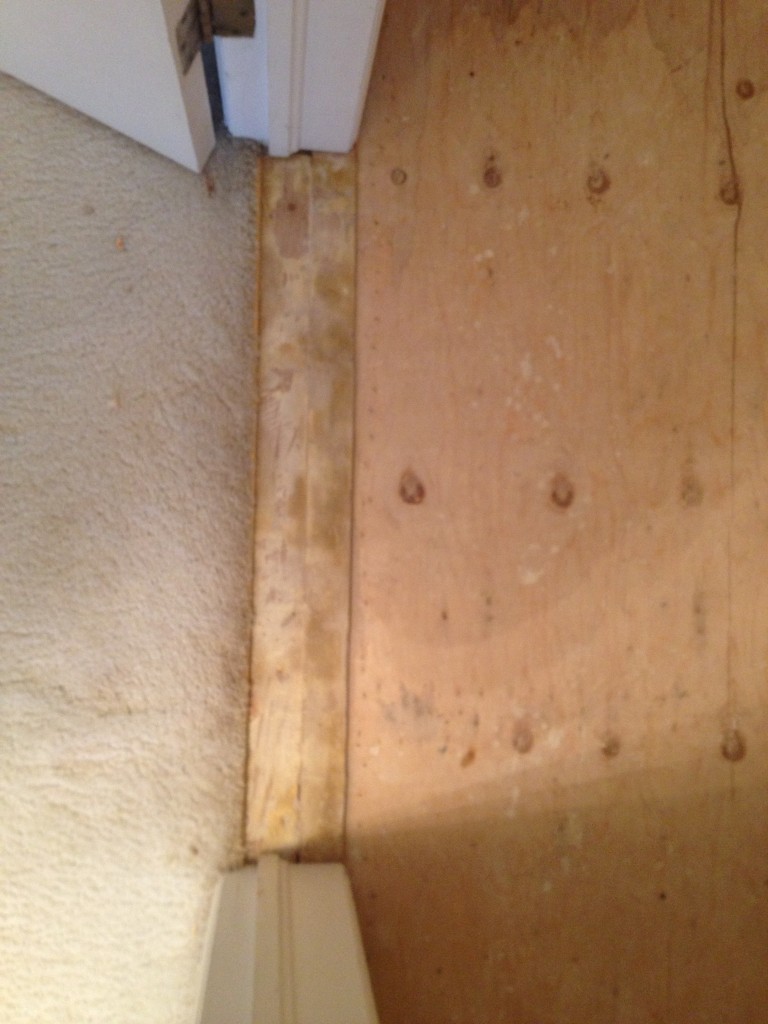
 powder room – new subfloor ready to be screwed down

IMG_6284

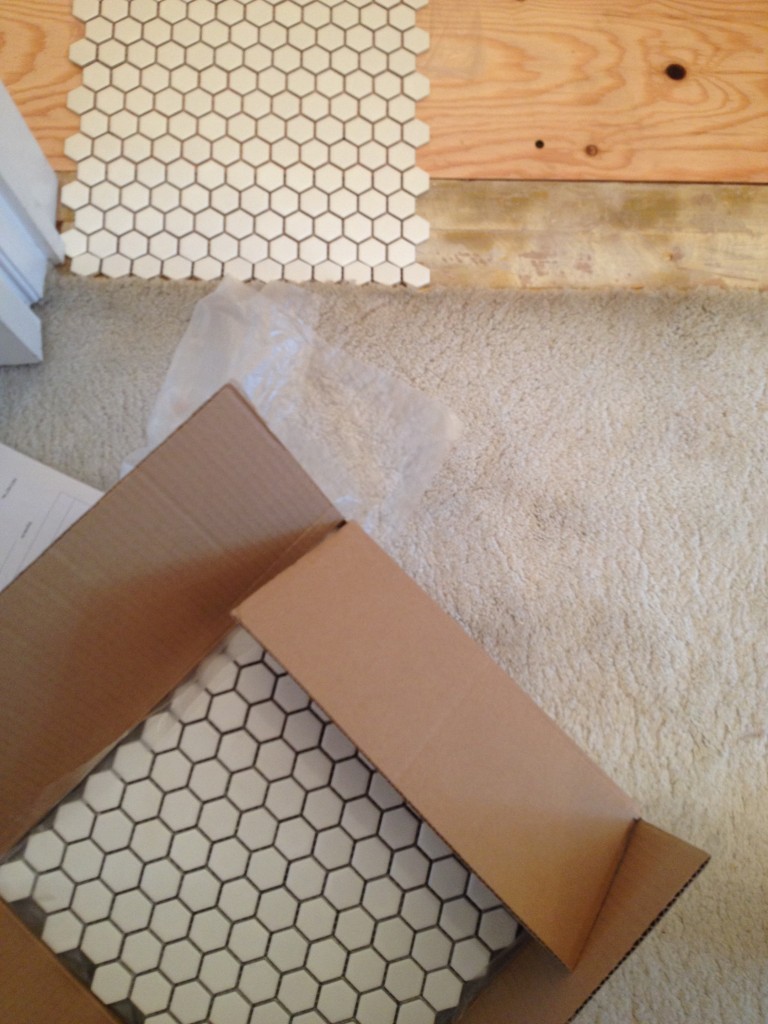
 planning for the new tile floor

Over the period of 4 hours, I managed to dry-fit my tiles in the space, figure out how to mix adhesive to the correct consistency (not too soupy), and installed my tiles. I’m SO happy with the progress I made and I am incredibly proud that I managed to lay my first ever tile floor*.

IMG_6292
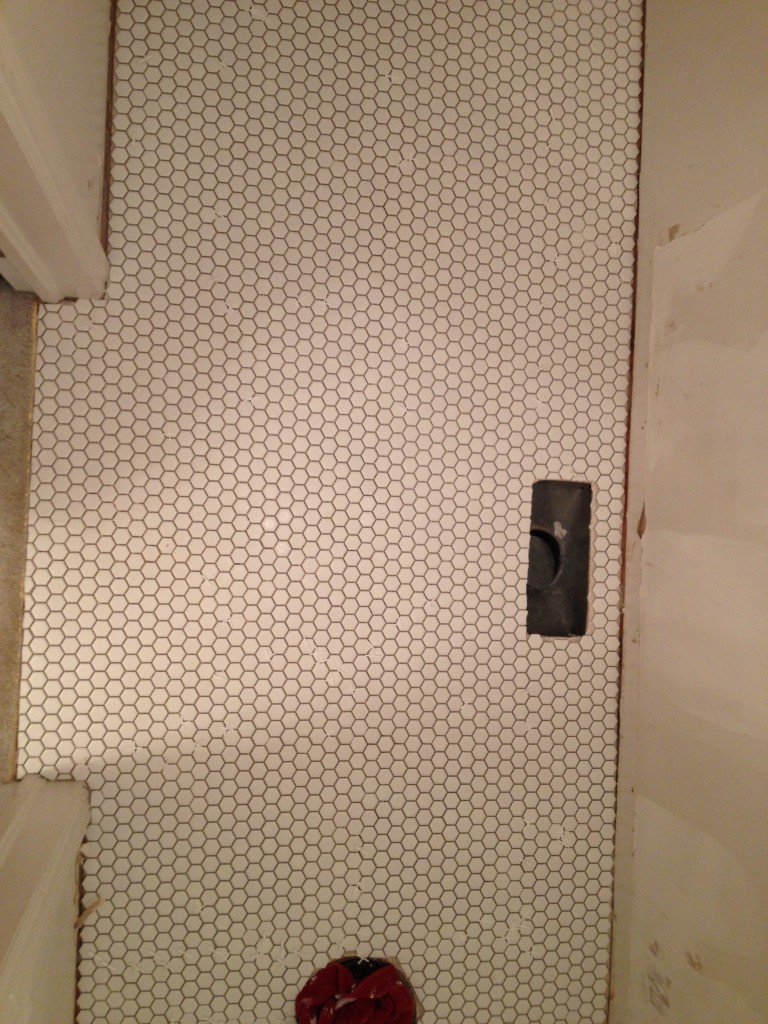
top view of the powder room – new tile floor is secure!

I haven’t grouted yet. I’m going to try and get to it this week or upcoming weekend. I am leaning towards a grey grout. Then I’m going to build my vanity and figure out how to do plumbing**.

* Thanks to Silvano at Twin City Tile for a mini lesson, the Home Depot for offering a free backsplash installation workshop, and for the blogging community for documenting the tile installation process. I’ve learned so much from you all! 

**I’ll likely leave the plumbing up to my dad. We’ll see.
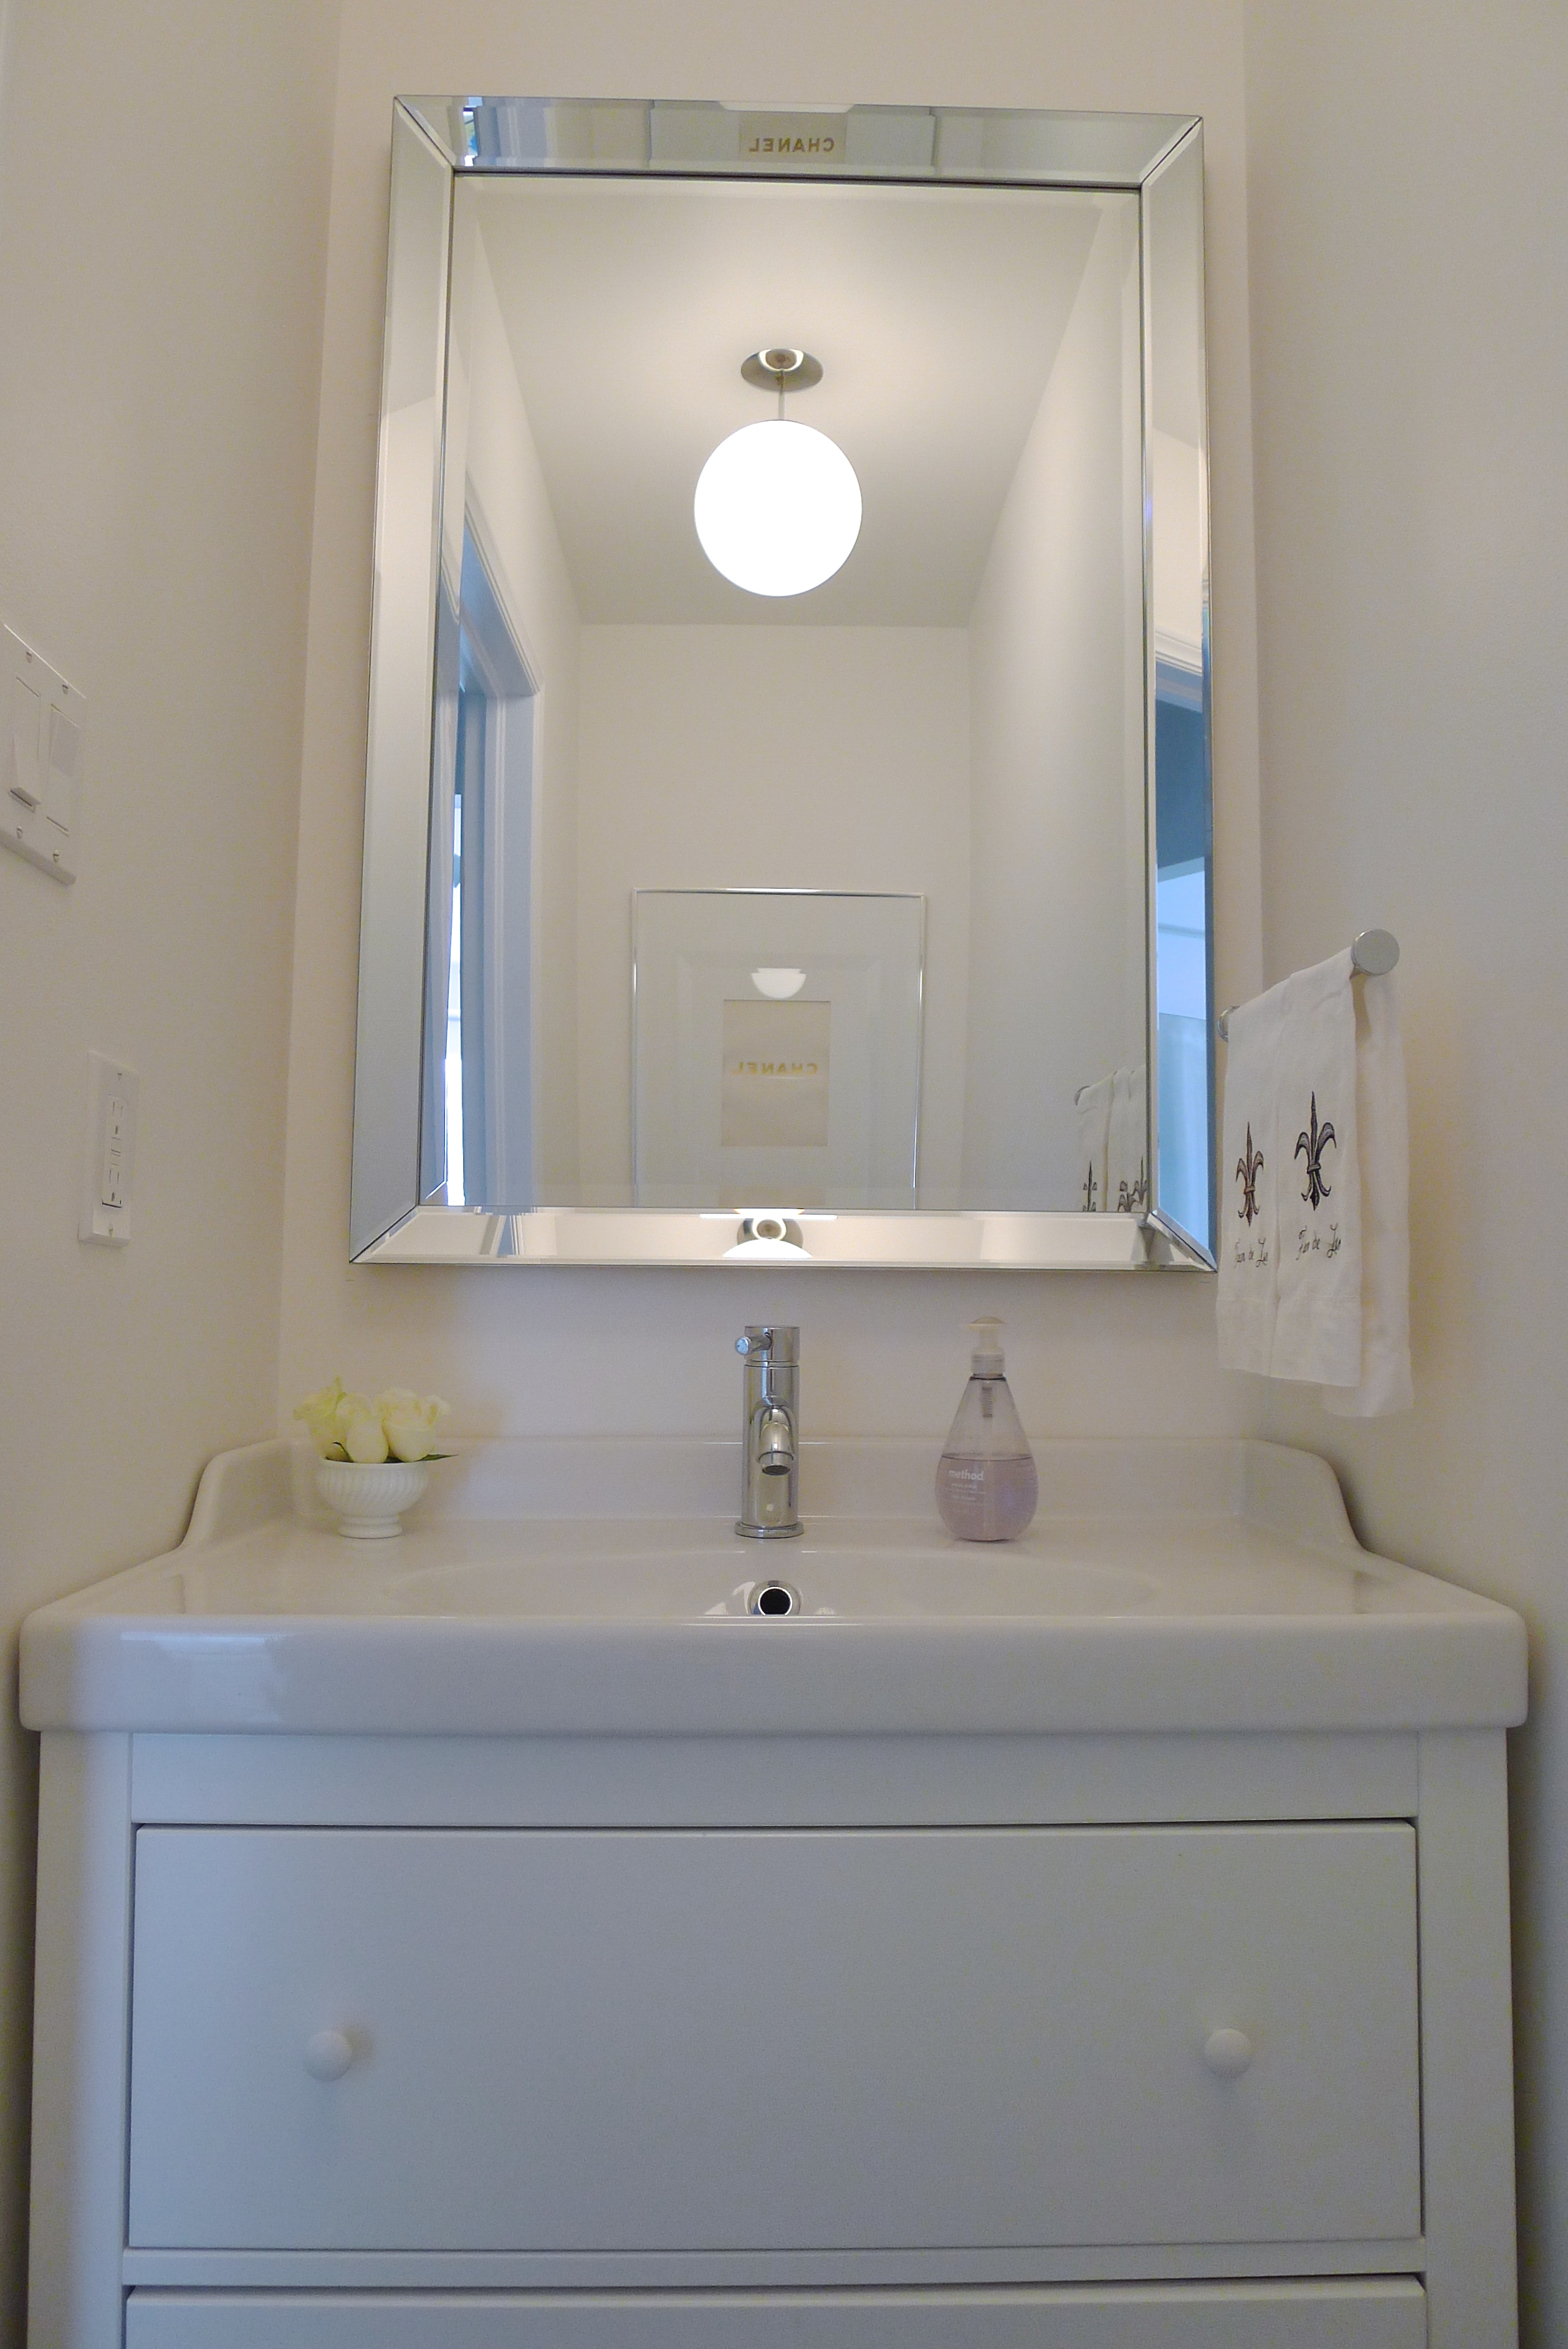
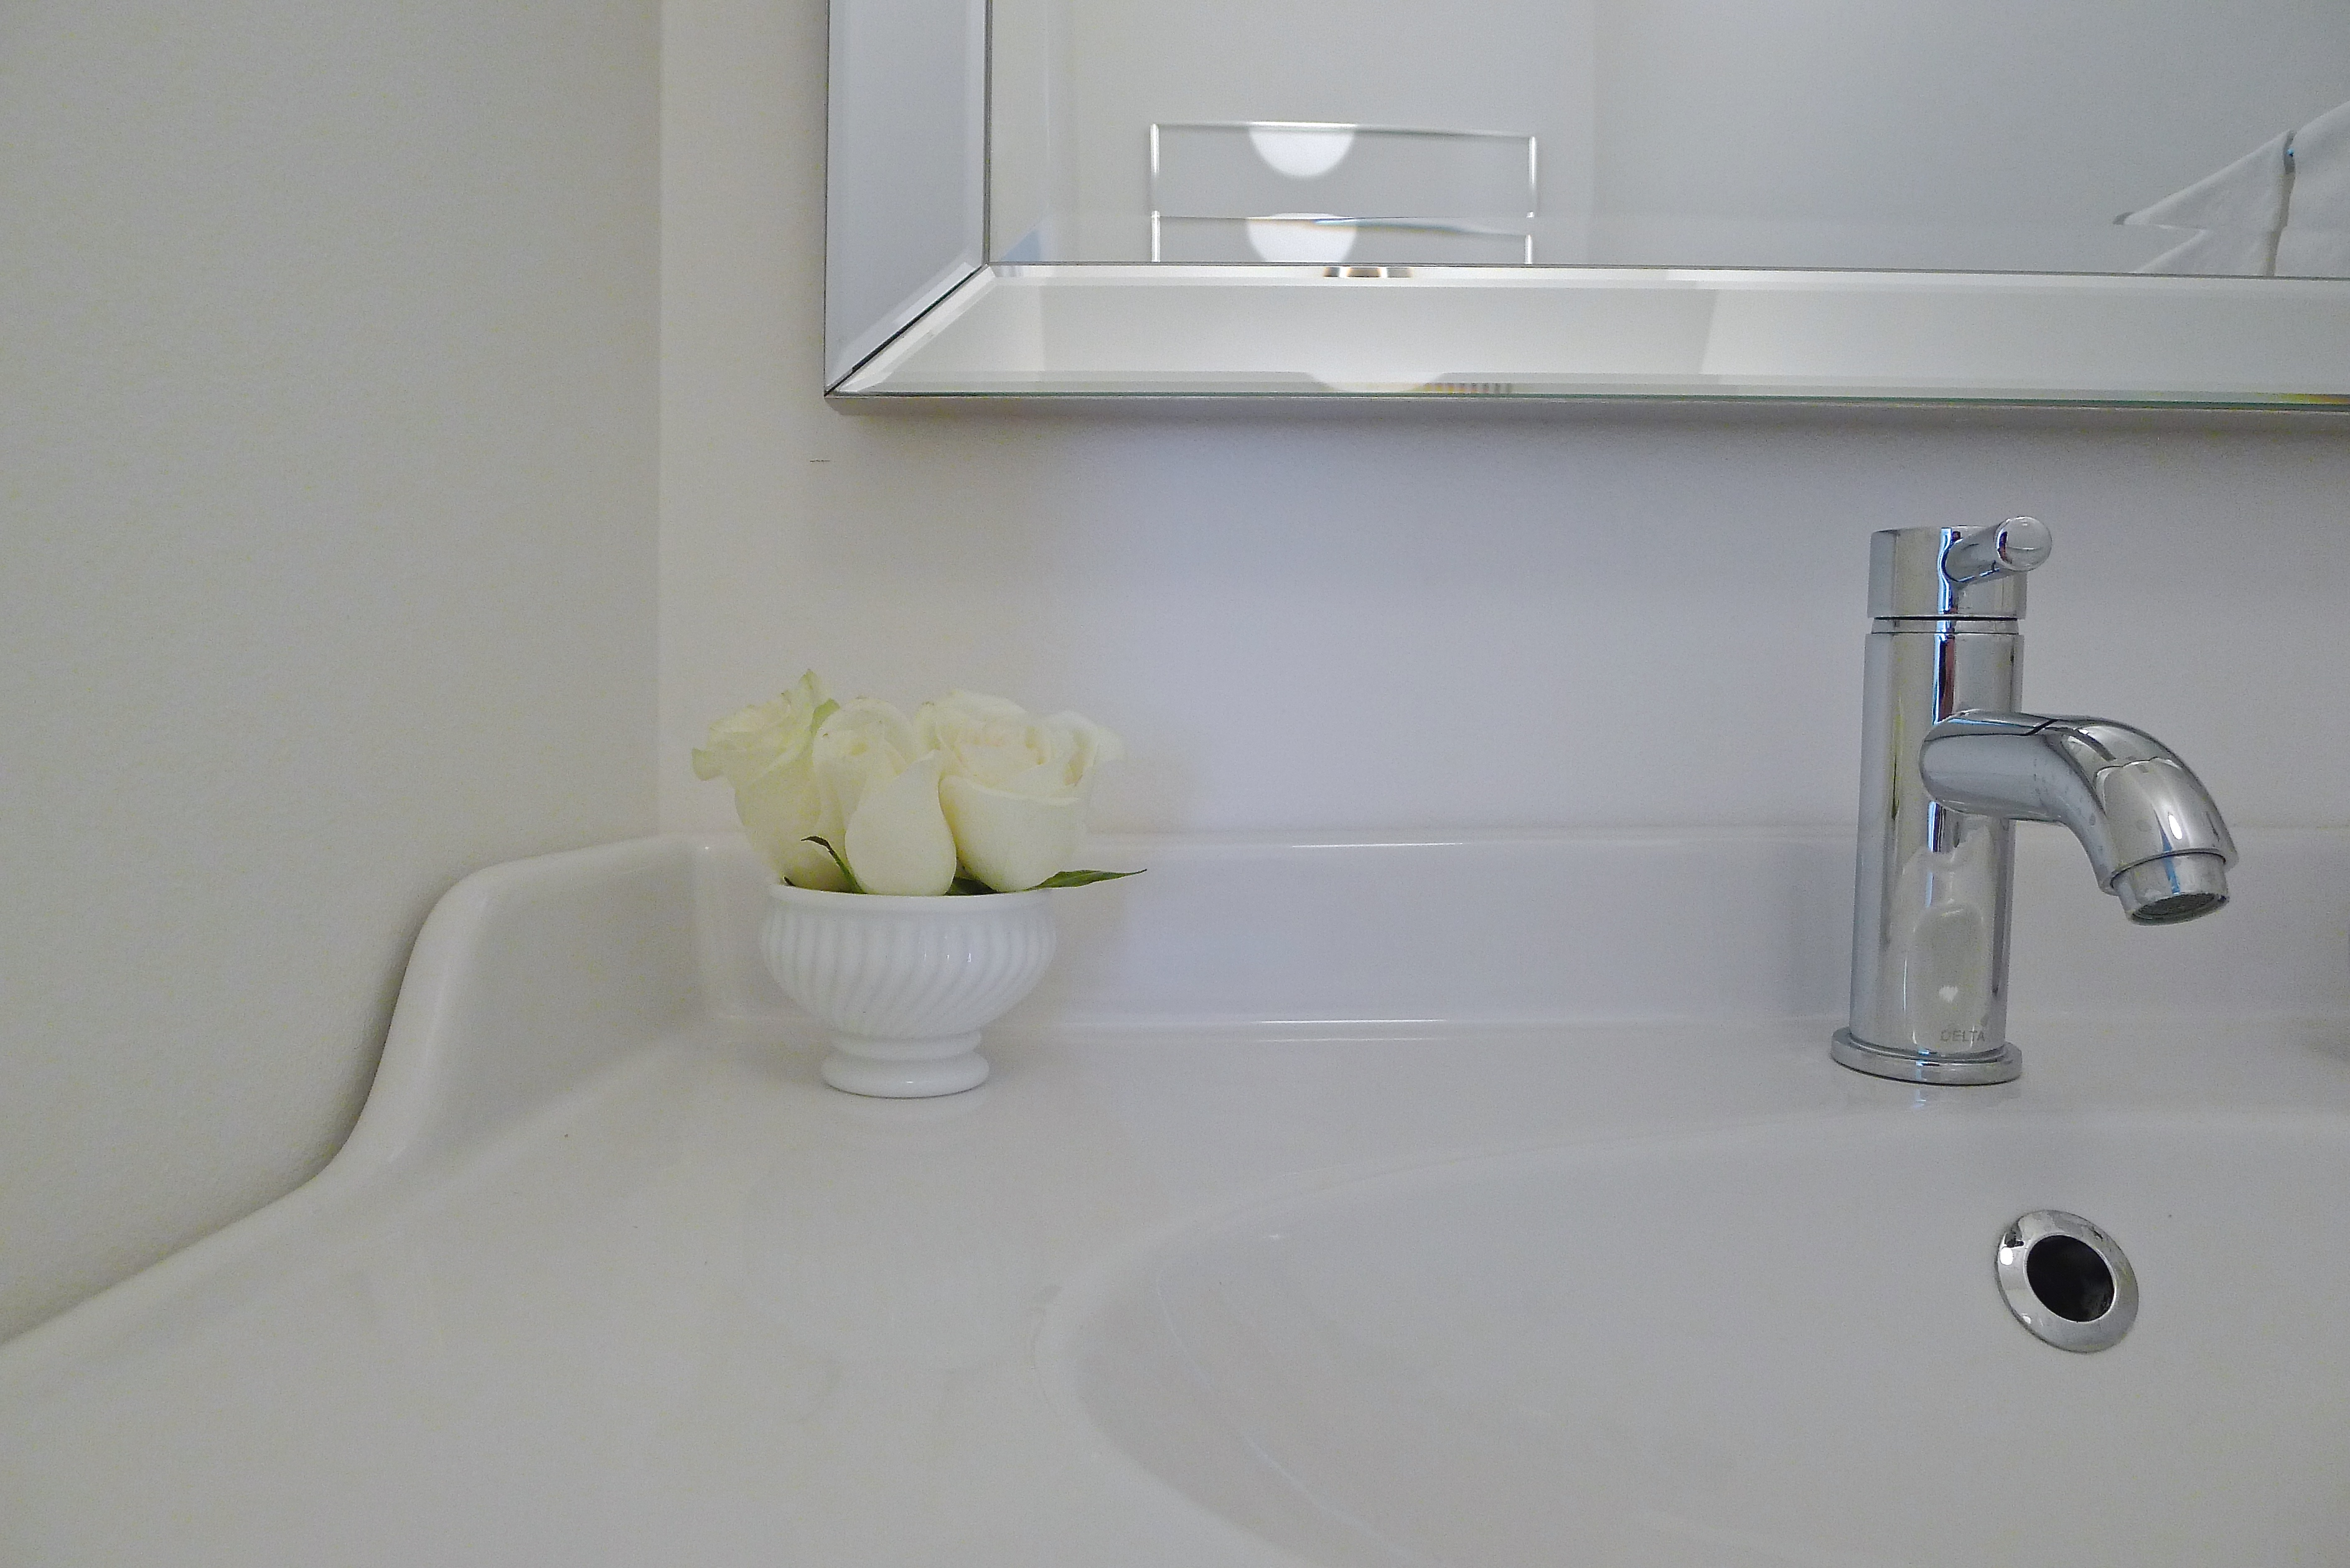
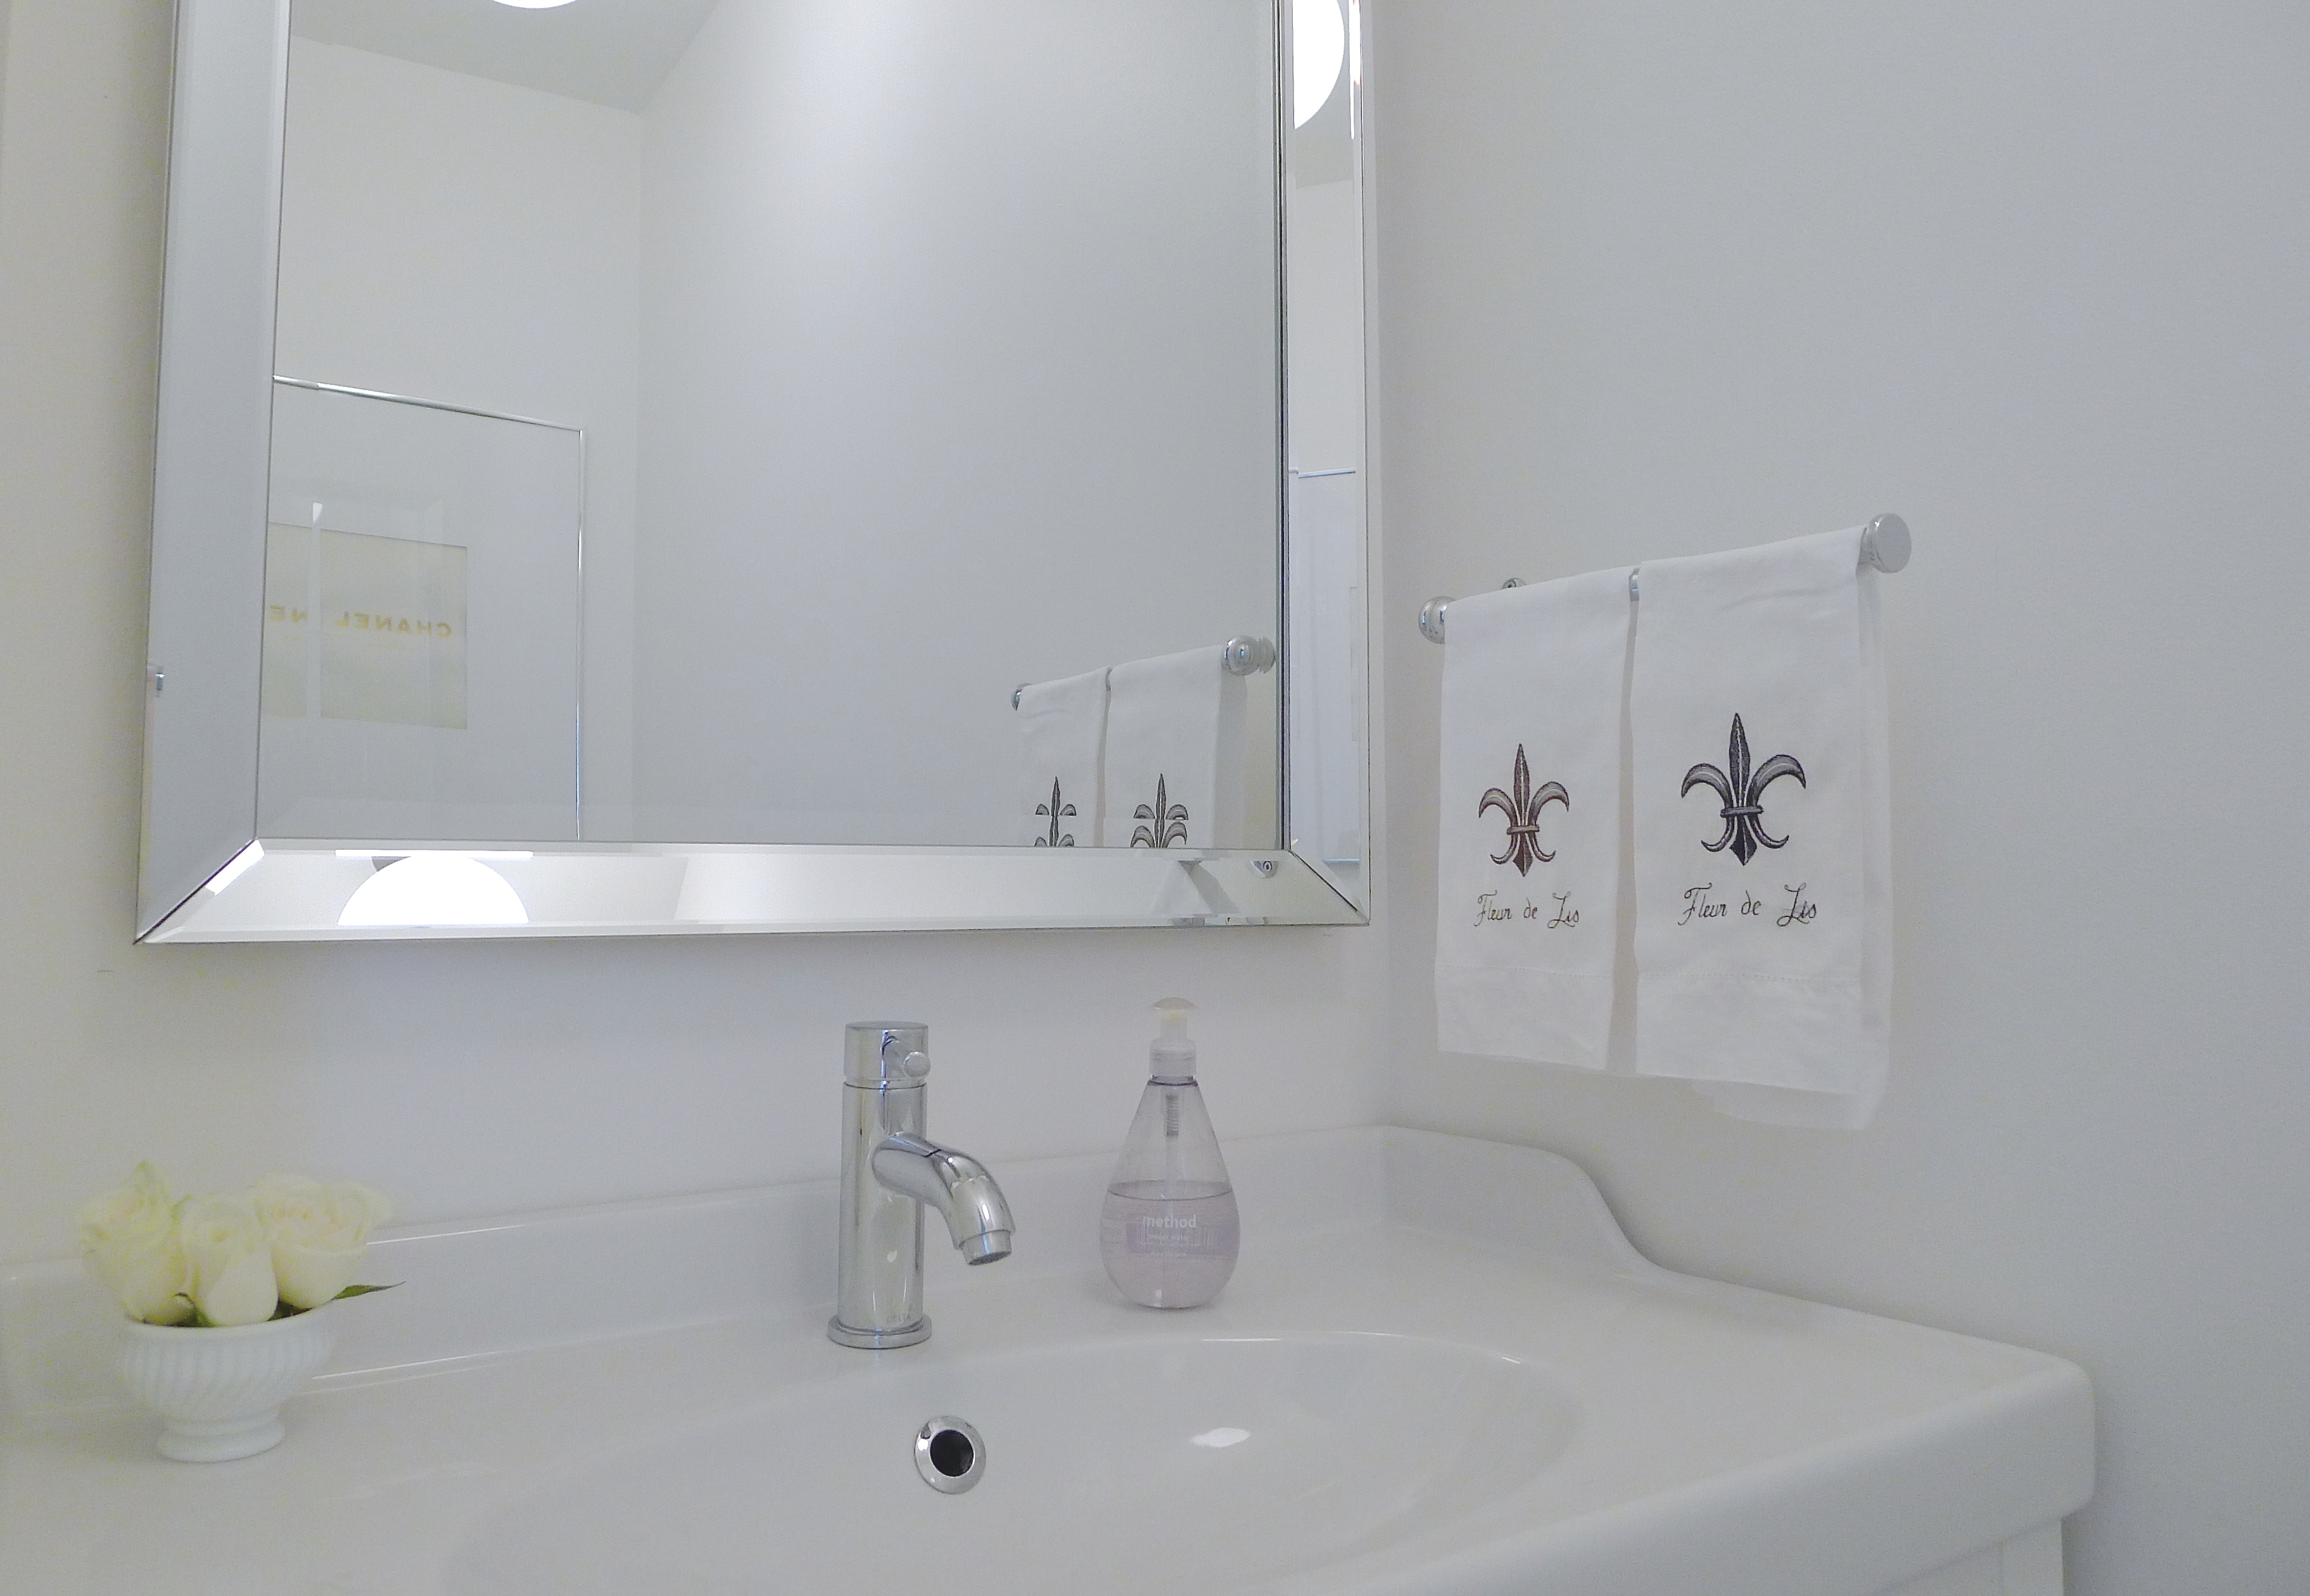
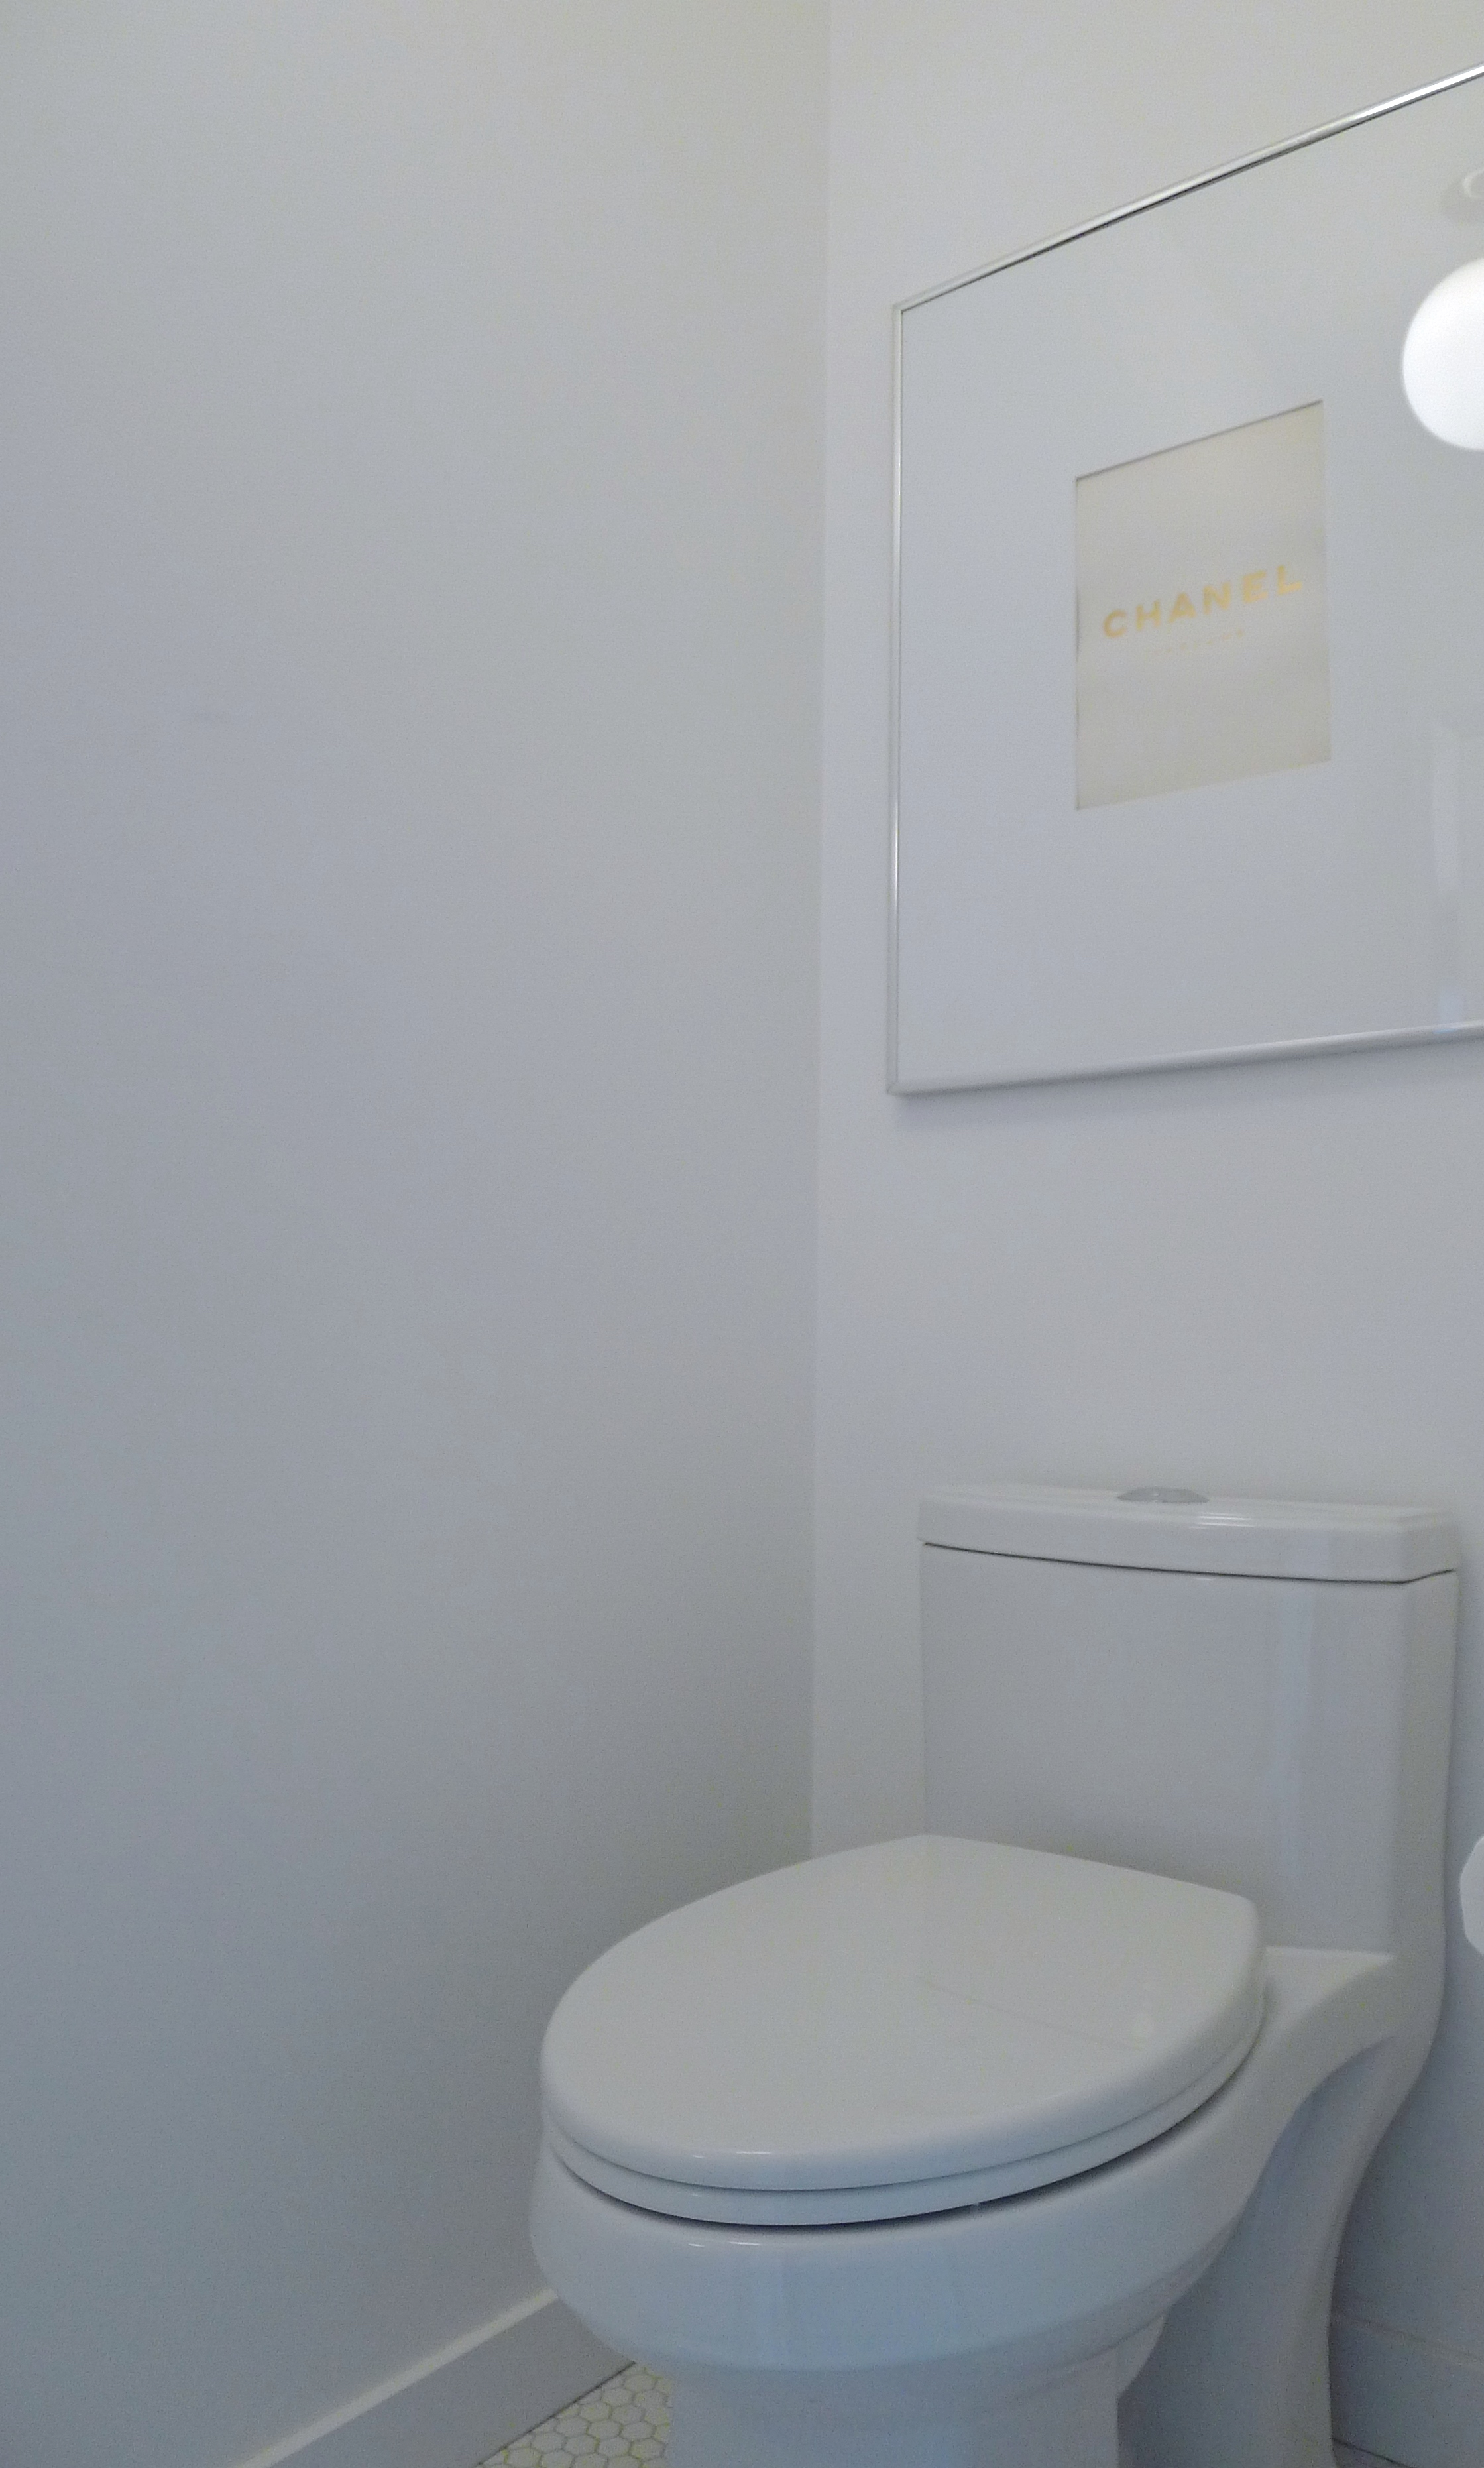
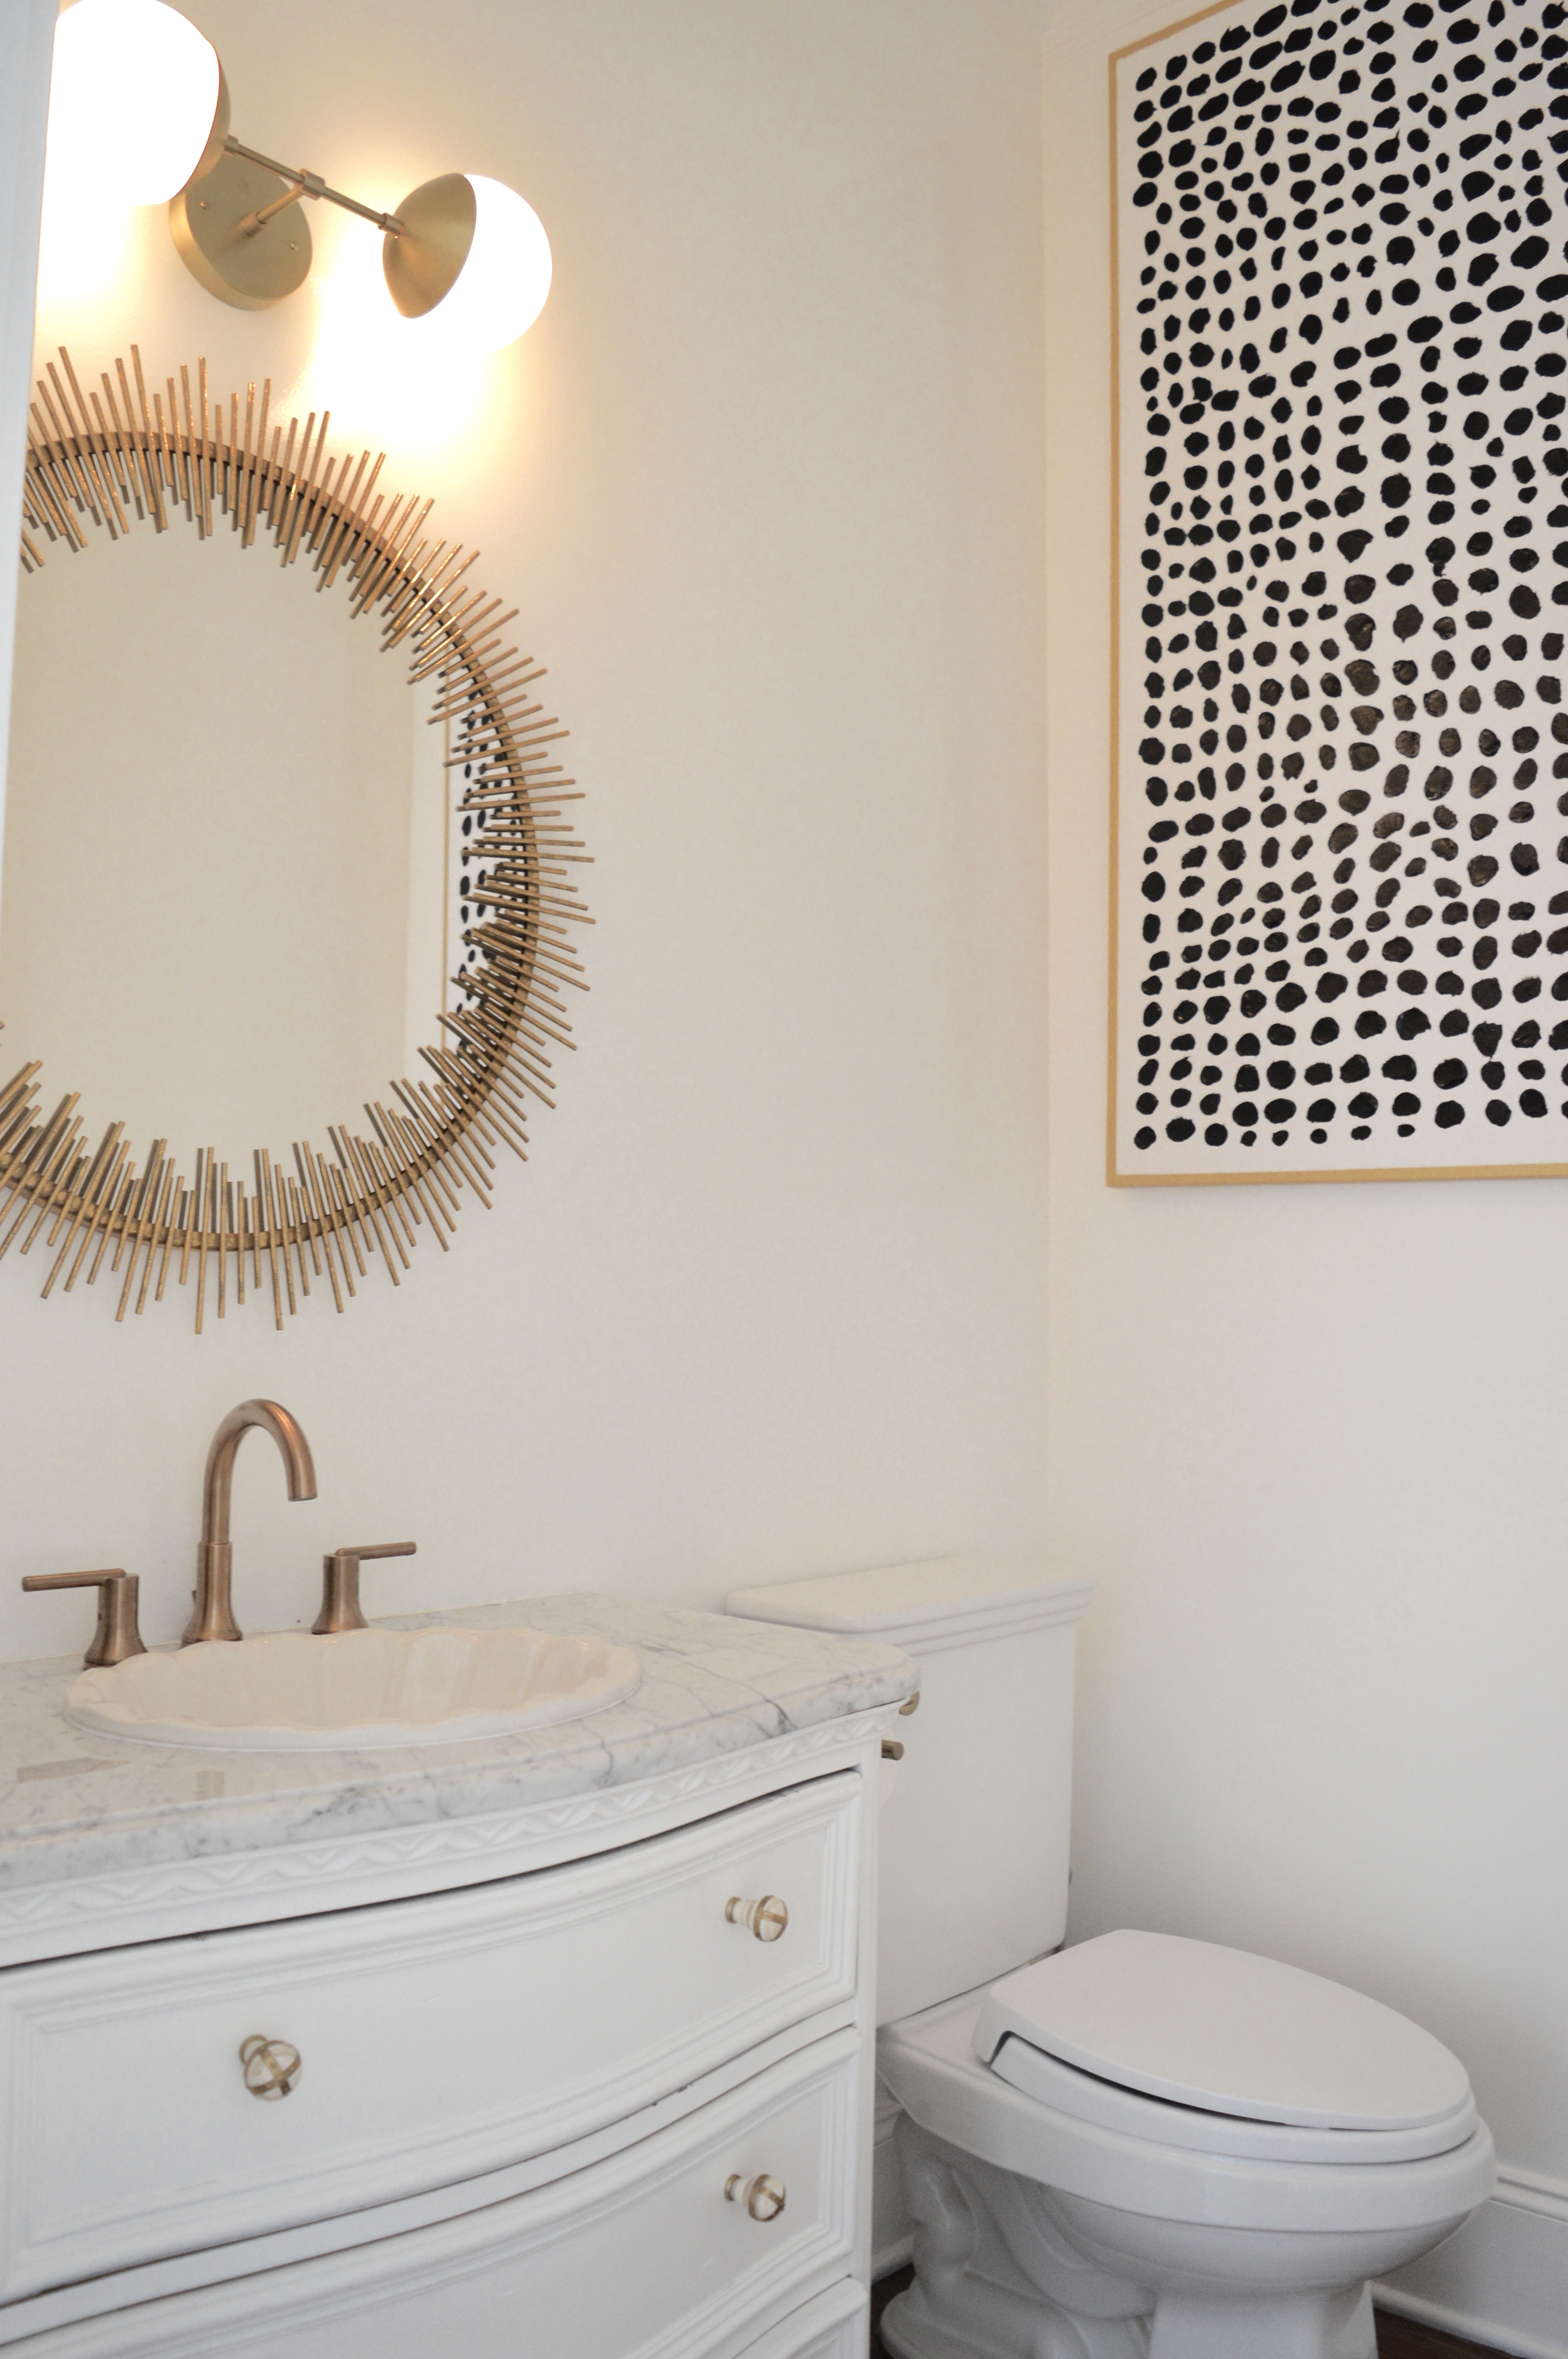