Design at Home: Our Kitchen

Our home is absolutely lovely. It’s a special place with an interesting history. There are unique nooks and crannies. And there are so many windows.

With every house, no matter how lovely, there’s always work to be done to upkeep it and to make it one’s own. Since moving in June, we have tackled a few minor projects, and we’re really trying to prioritize tasks to align with our needs and budget. This has been hard for me because I want to do everything all at once!

One of the areas that will need the most work in the future is our kitchen. It is large and fully functional, but we have ideas about what how we may want to change it to maximize the space and increase efficiency. Our design dreams, however, are costly, and the changes we have in mind are in our long-term plans.

That said, there are a few things that we would like to change now to make the kitchen more functional and beautiful.

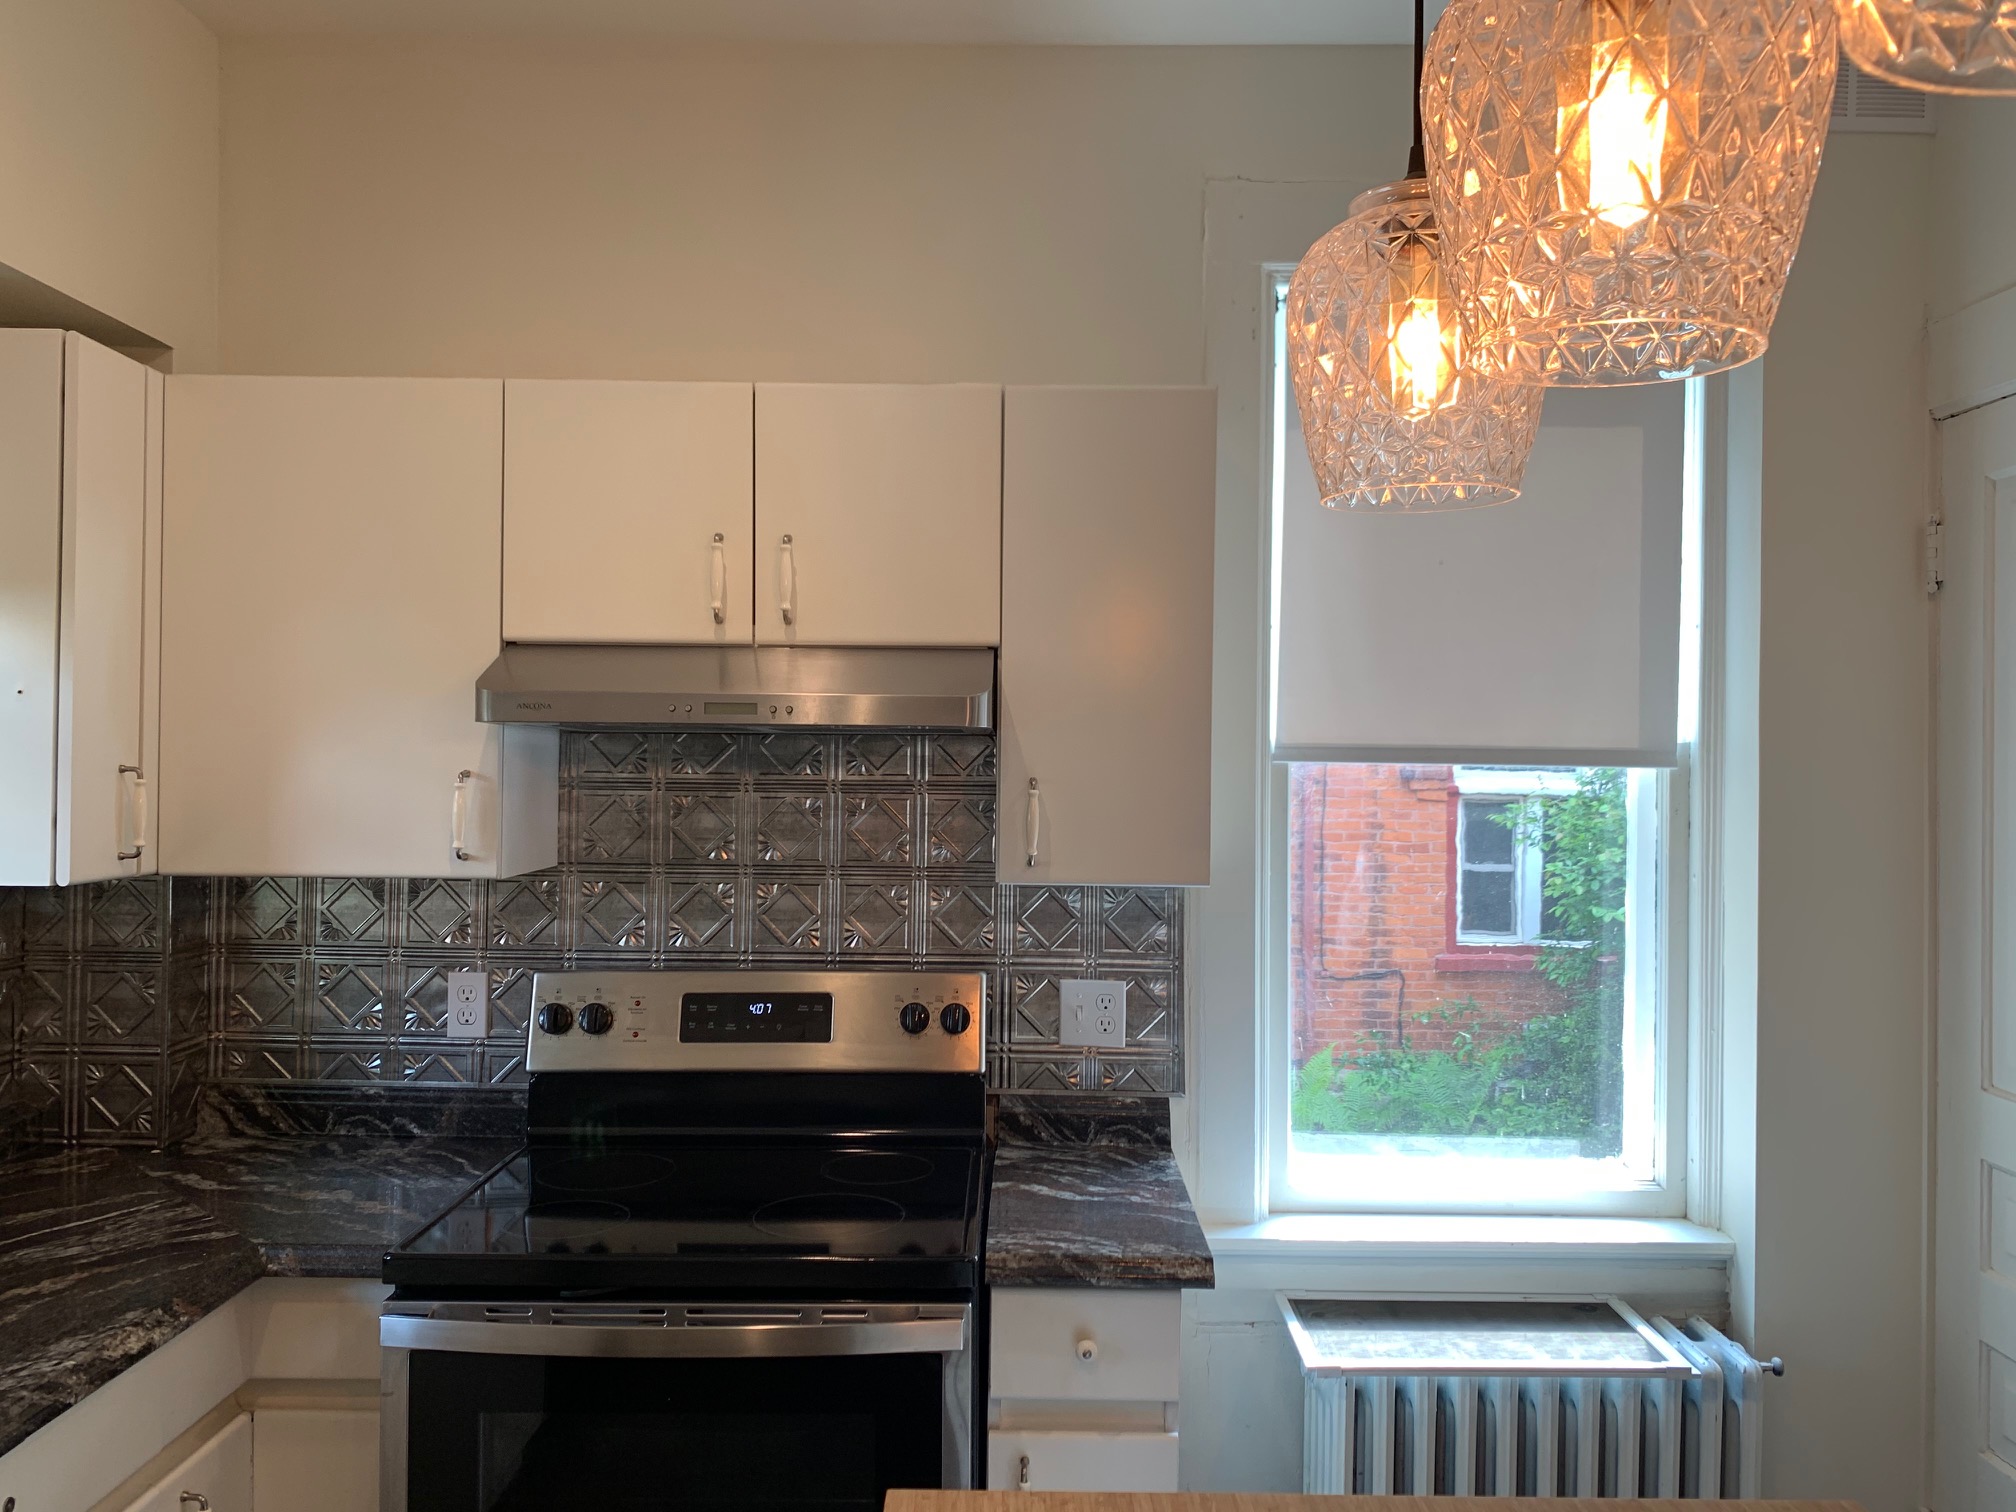
Here’s what the main part of the kitchen looked like just before we moved in.

kitchen: before

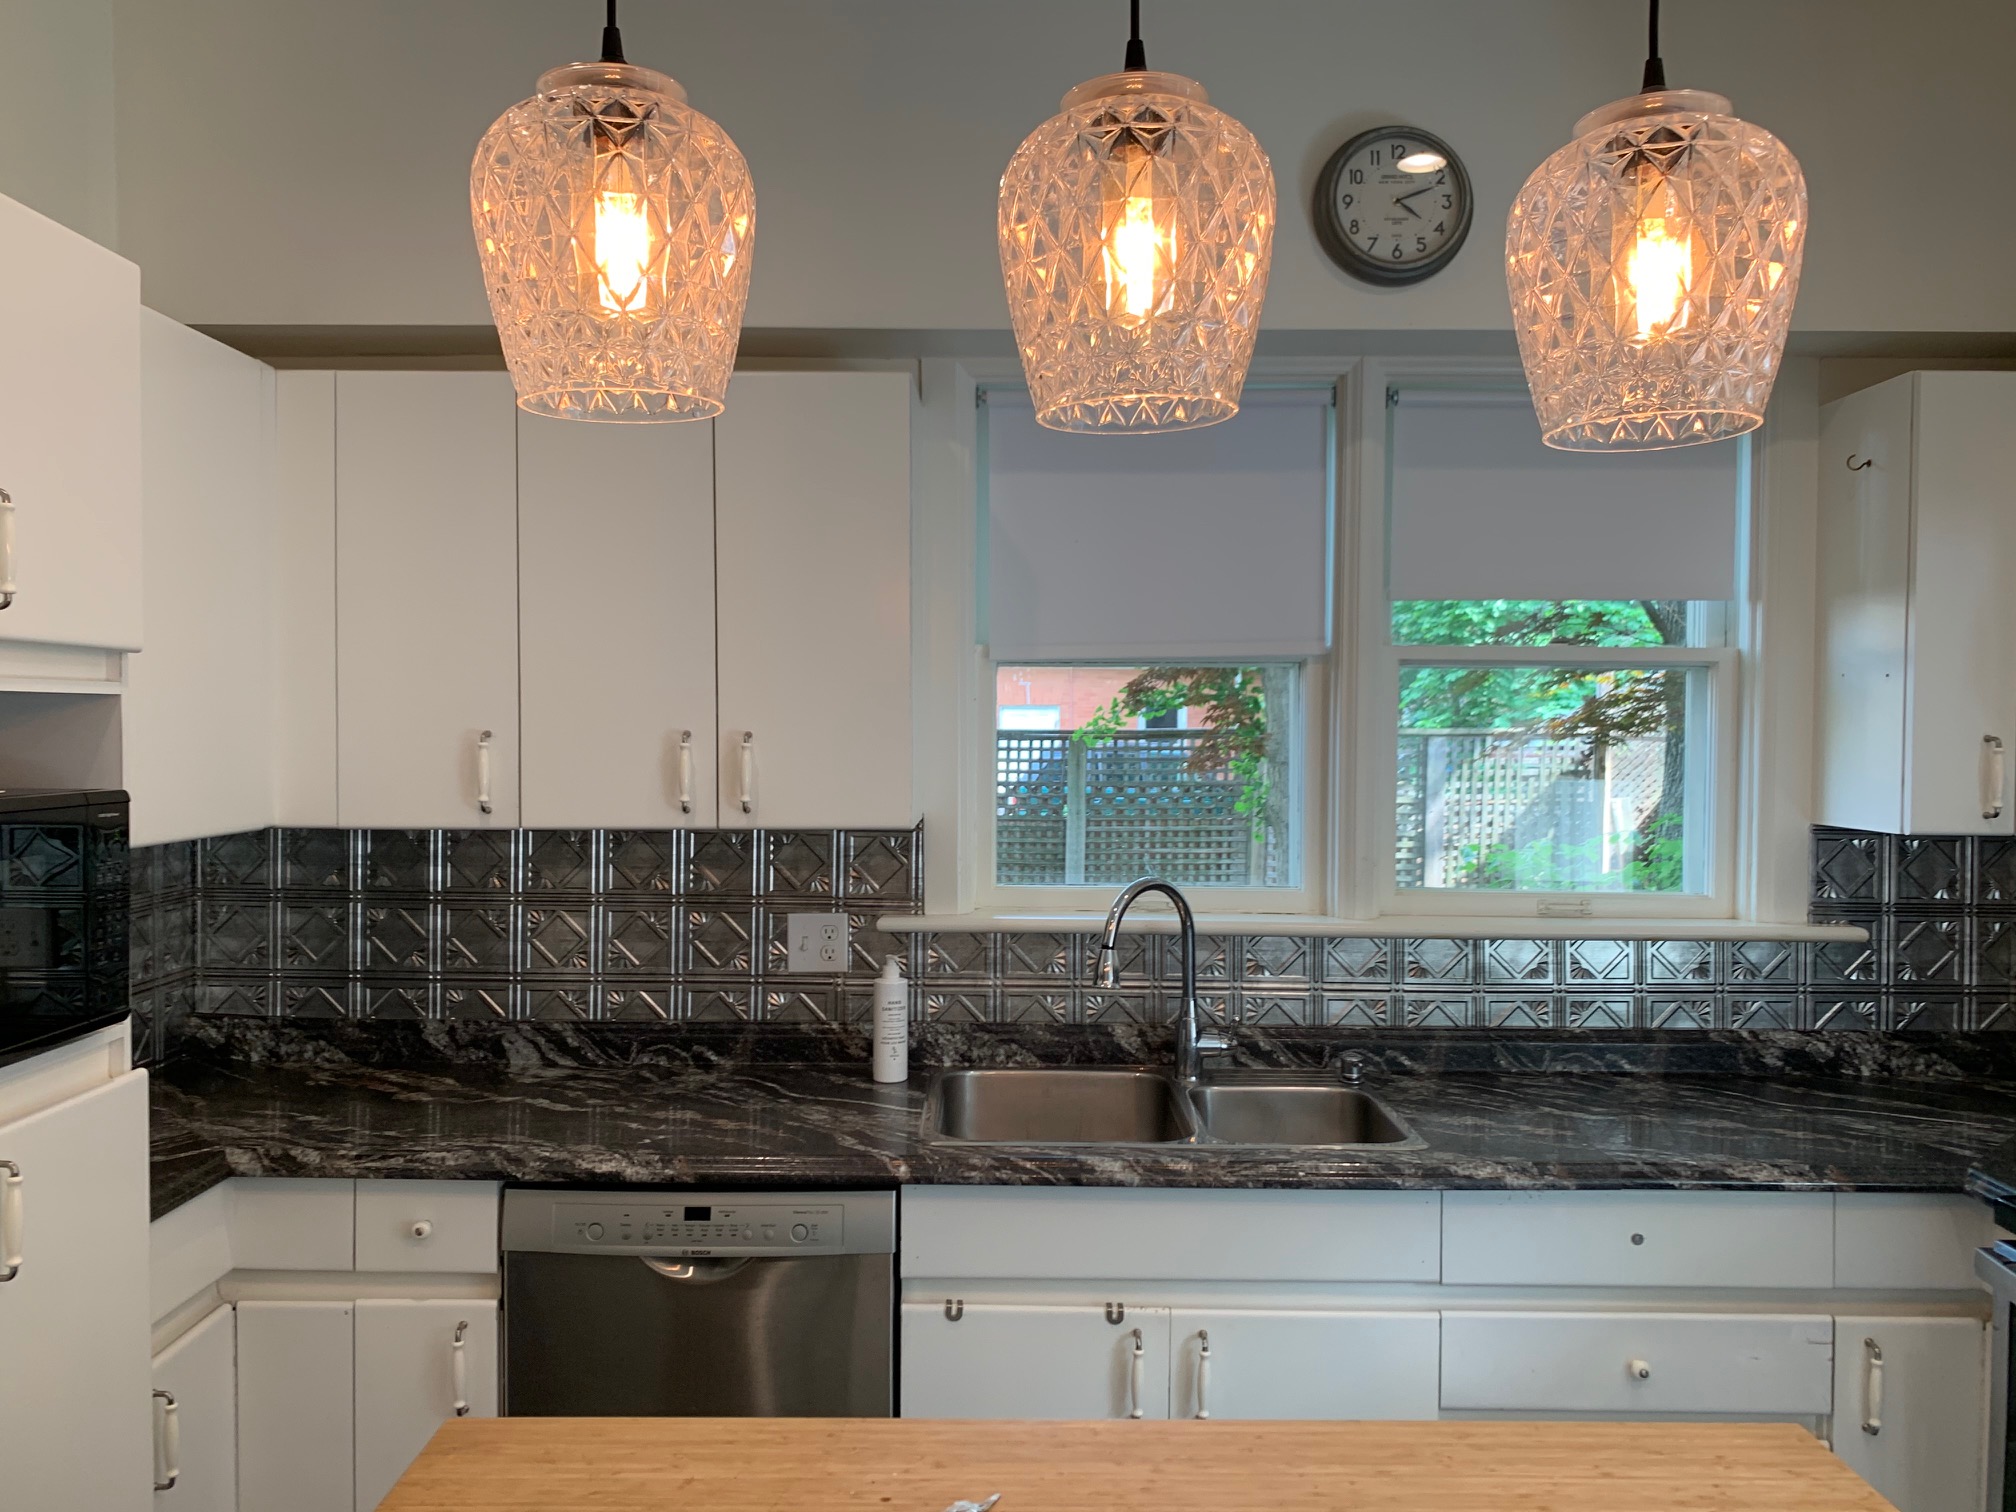
We like all the windows, the basic white cabinets, and the appliances, including the double fridges (what a luxury)!

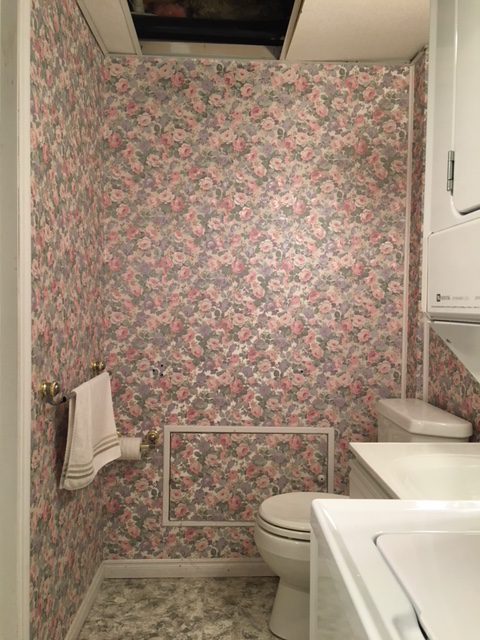
The counter and backsplash isn’t our style. The faucet and sink don’t maximize functionality. The cabinetry doesn’t maximize our nearly 10-foot ceilings (future project).

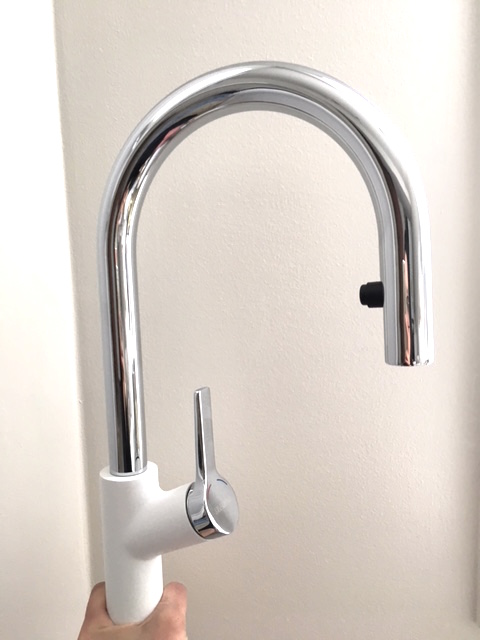
The faucet is terrible. The pull down option is broken, and it looks and feels so inexpensive. It feels like it could break at any moment. When I suggested we get a new faucet, my beau told me that the sink was even more bothersome to him than the faucet. The sink is shallow and has two bowls (regular size bowl plus a 3/4 size bowl). The sink, to my surprise, was annoying him just as much as the faucet was annoying me! We discussed the possibility of replacing one or both items in the short-term or living with the existing set-up until we’re ready for a larger remodel.

In the end, we decided that we wanted to complete a mini makeover so that the kitchen would be enjoyable, functional, and pretty (more for me!). A mini remodel makes sense for us while we save money and plan a larger remodel for the future (similar to Tiffany’s approach). Essentially, this means installing a new sink, faucet, counter, and backsplash.

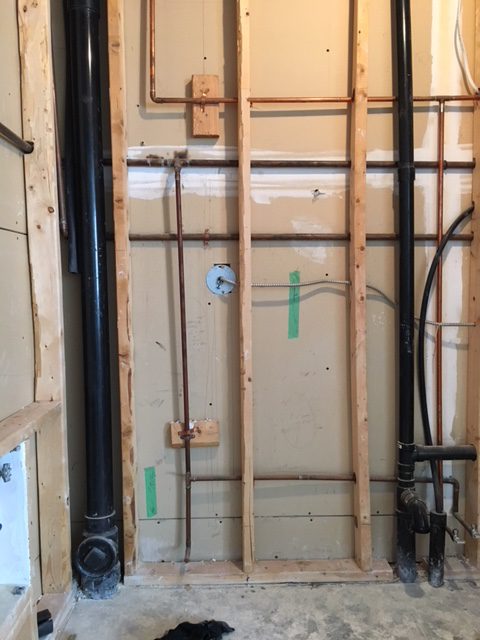
Step 1 of our mini makeover meant that on one rainy day, I ripped off the fake-tin, plastic backsplash panels. I then primed the walls as a temporary, cheap makeover. We removed the glass domes on the lights, too.

kitchen: progress

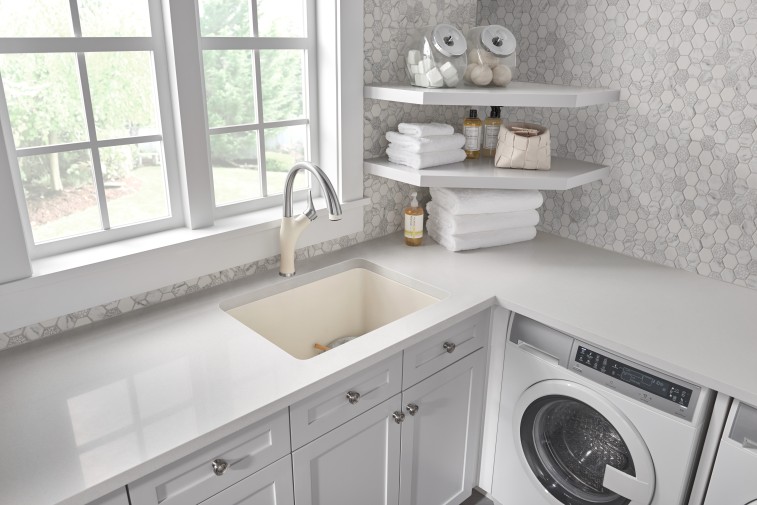
Step 2 will be to replace the faucet and sink. We’re getting some help with this thanks to my long-time partner, BLANCO Canada. (Remember my old laundry room? I was sad to say goodbye to that little space.) I was so happy to coordinate our current kitchen project with the BLANCO Canada team – they’ve always been a real pleasure to work with! And I love that their products are made in Canada (remember this BLANCO factory tour?).

On our wishlist:

  • a high functioning faucet with pull-down spout and minimal splash
  • a deep double sink that could withstand messy kitchen work and that would look modern

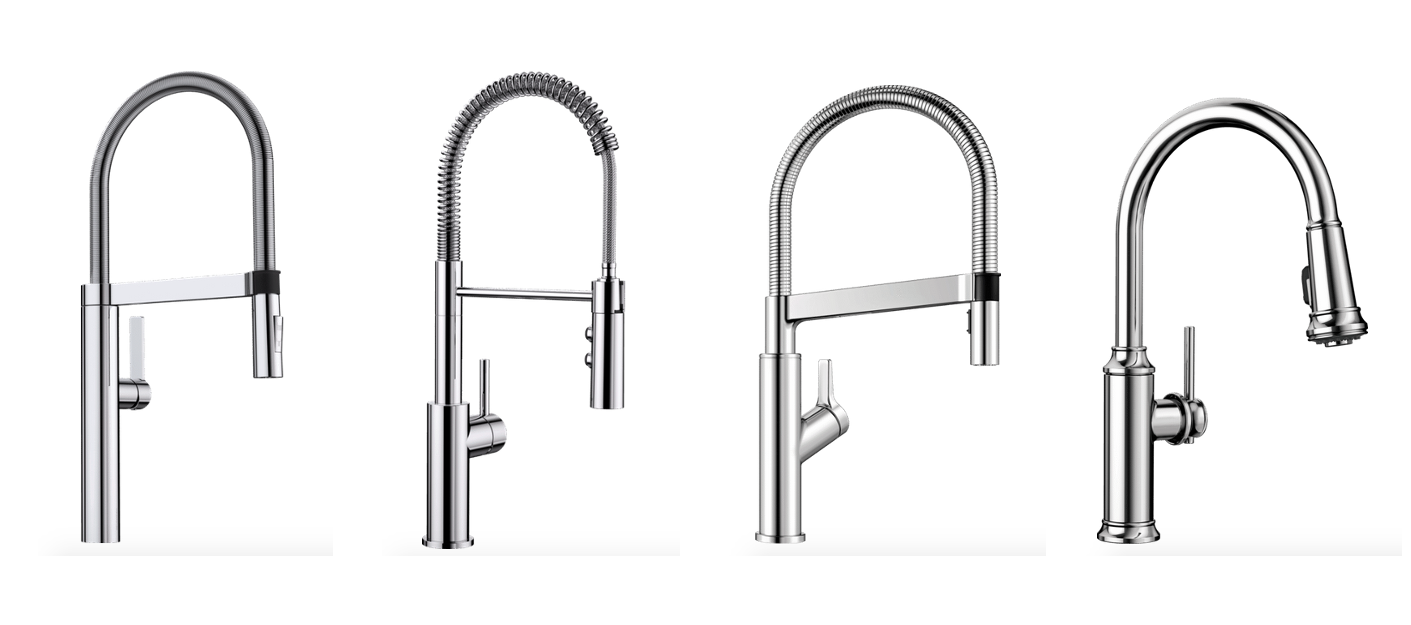
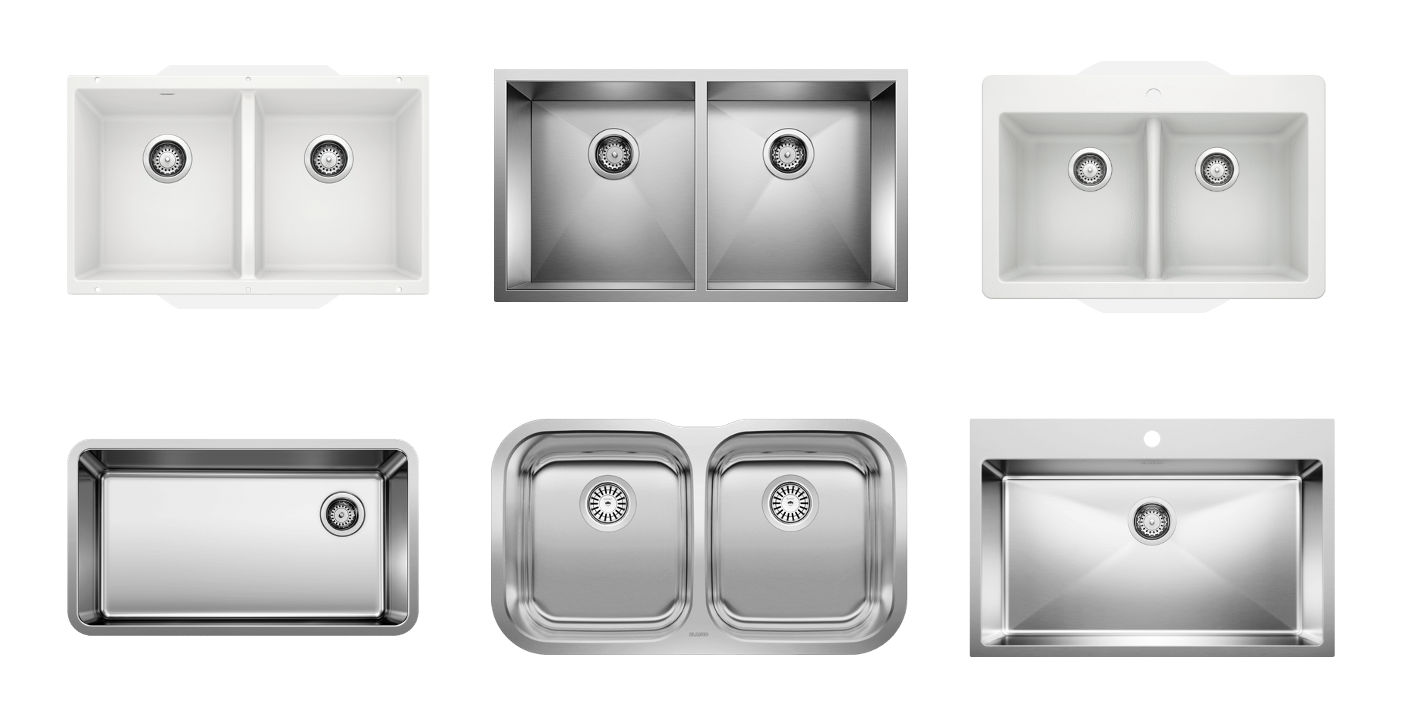
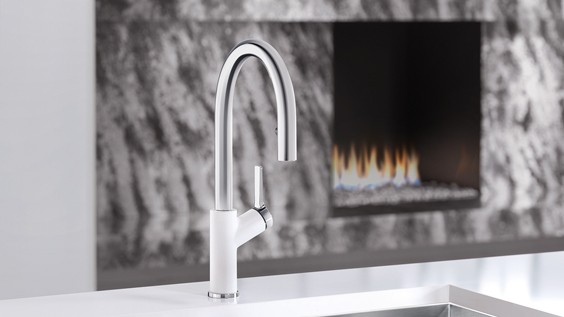
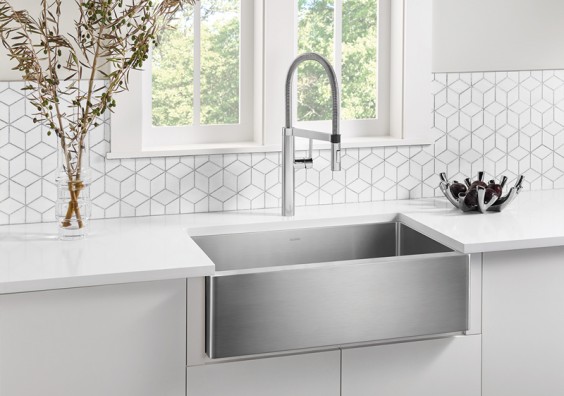
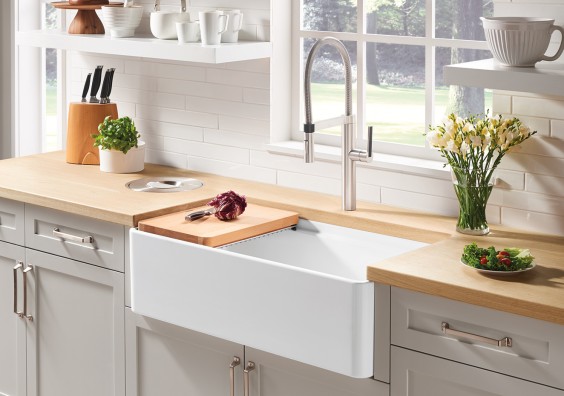
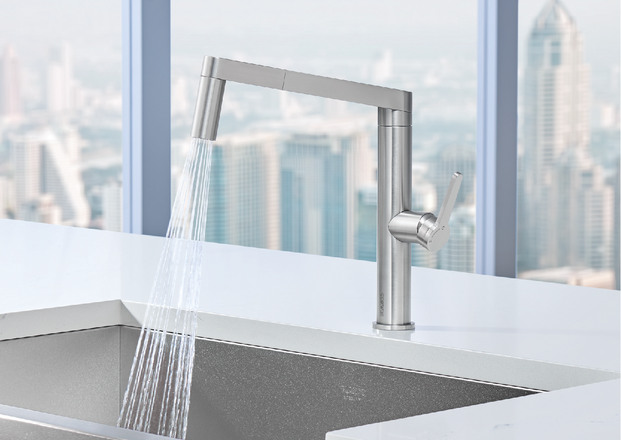
Here are the faucet and sink options we considered:

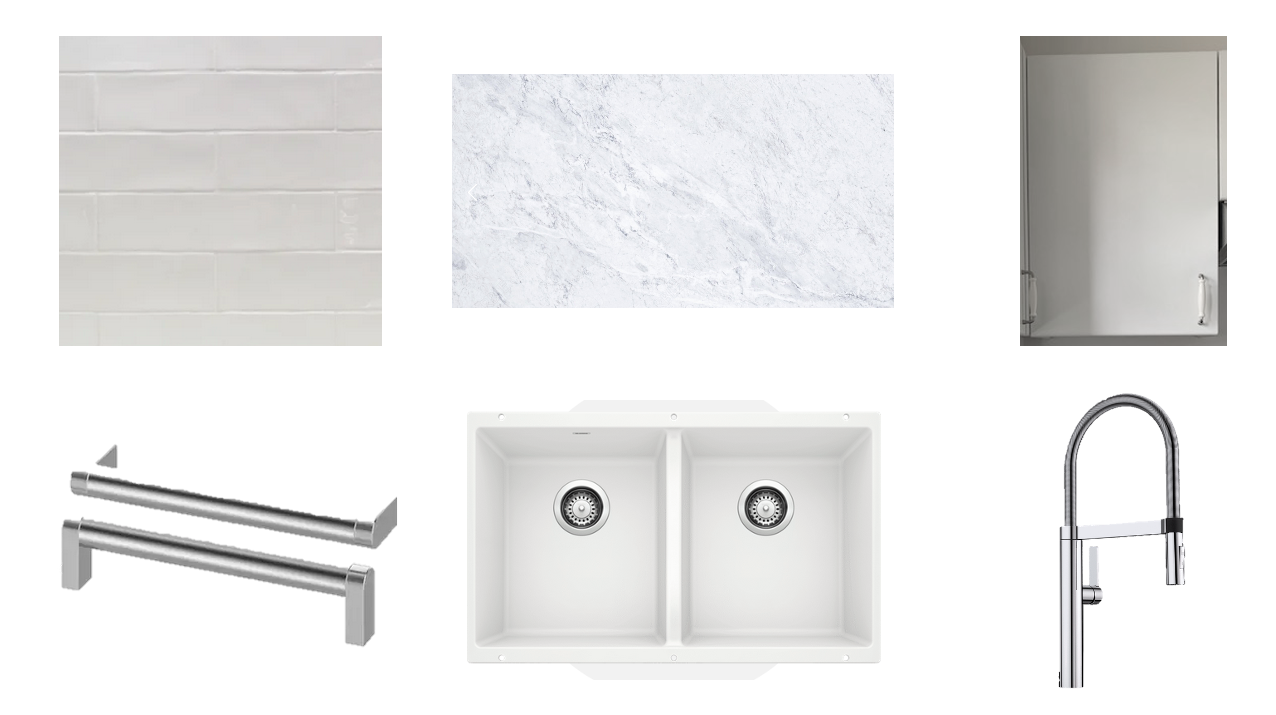
Step 3 will be to install a stone countertop (I’ve got my eye on carrara marble or a white quartz), backsplash, and door handles.

Our current mini-makeover design board looks like this:

white subway tile backsplash, carrara marble countertop, existing white cabinetry, cabinet handles, PRECIS U 2 sink in white, BLANCOCULINA faucet in chrome

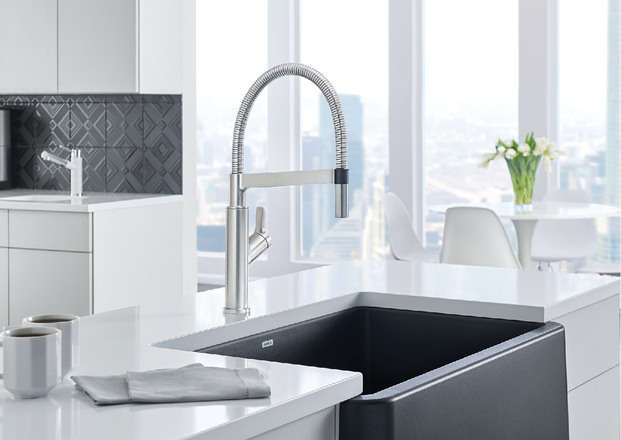
We liked just about all of the faucets in BLANCO’s collection. Everything was sleek and powerful. We wanted a high arc with a pull-down feature, and the BLANCOCULINA suited our tastes well.

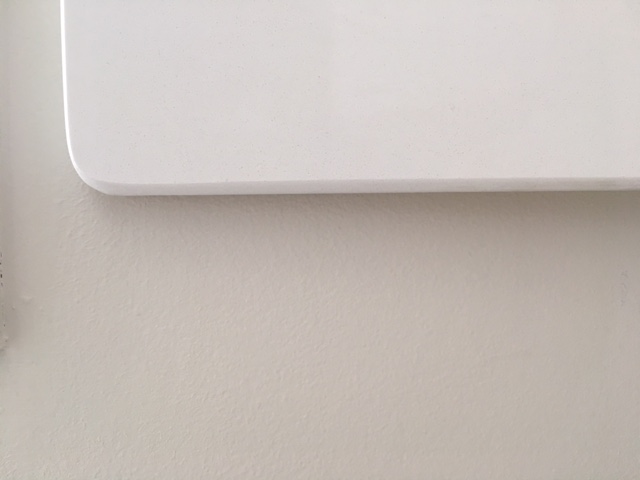
We have chosen BLANCO’s Silgranit PRECIS U 2 sink in white. Daring, right? We debated between single and double bowl options, but decided that a double bowl might suit our current needs best. We were open to both stainless and Silgranit options, too, but I was drawn to the PRECIS U 2 in Silgranit because it’s unique. I have seen the Silgranit in action, and I am confident that the white will withstand the wear and tear of daily kitchen use. Tim and Chris have a white Silgranit in their kitchen, and they let me know that it has been easy to clean.

And this brings me to the end of the first post about our kitchen mini-makeover. In a few weeks, I’ll be sharing some progress and after photos.

Marketplace: BLANCO Canada

I’m pretty excited about what’s developing in my laundry/bathroom combo room. It took a few weeks to get going, but things are moving along now. One of the brands that I am working with on this project is BLANCO.

Not only are BLANCO’s products very much to my liking design-wise, but I love the history of this company. It has been family-owned since 1925, and its products are known for their German engineering and high quality. The BLANCO Canada products are manufactured in Canada, which definitely pleases me.

The team at BLANCO set me up with a white-white-white sink and faucet combination that are going to be put to work in my new space.

BLANCO Liven Silgranit

The Liven sink is made from BLANCO’s well-known Silgranit material, which is extremely durable material that comes in seven colours. It can be undermount of overmount. I have a white one (naturally), but the Cinder and Metallic Gray also caught my attention. Since I’ve had a normal (small) vanity sink in this space for the last five years, I’m very eager to have a large workhorse moving forward.

As for the faucet? My plumber will be installing BLANCO’s Urbena faucet. It is so sleek and clean – just what a white laundry room needs!

BLANCO Urbena faucet

While there’s a good chance that you like the Liven and Urbena as much as I do, you may be curious about other items in the BLANCO collection. Not to worry – everything else is lovely, too.

 BLANCO Quatrus apron-front sink

BLANCO Profina sink

BLANCO Panera faucet

BLANCO Solenta faucet

Thanks to BLANCO Canada for sponsoring this post. All opinions are my own. Photos via BLANCO.

One Room Challenge: Laundry Room – Before – Week 1

Well, it’s official. I’m taking part in my first One Room Challenge (ORC) as a guest participant. If you’re unfamiliar with the One Room Challenge, it’s a twice-yearly event that happens in the design blogger community where design bloggers makeover a room in 6 weeks. 6!

Calling it Home started the challenge over a decade ago, and ever since, design bloggers have been putting their best foot forward.  There are two lines of participation at this point. First, on Wednesdays, a group of 20 featured participants will share their progress (see their week 1 posts). Then, on Thursdays, any design blogger can participate as a guest participant. You can check on everyone’s progress at the One Room Challenge site as well as on individual blogs.

So how will I participate this year? So what am I going to feature over the next 6 weeks? My combo laundry room/bathroom. And I’m pretty darn excited! (If you’re new to White Cabana, here’s a peek into my home.)

To be honest, I started this project weeks ago, but progress has been s…l…o…w. Given my work/life schedule and my lack of contractor contacts in Waterloo, renovating the space from top to bottom in 6 weeks wasn’t looking promising. 12 weeks, maybe. 🙂 But I can definitely feature it in 6 weeks! And that’s what I’m committed to doing.

Warning: This post contains some colourful before photos that may hurt your eyes.

Here’s what this room looked like on the day I took the first tour of my (future) house five years ago. Soon after I moved in, I removed the support bar (and about 30 others around my house), the shelf unit above the toilet, and the glass shelf. I also painted the wood strip on the sink cabinet and covered almost the whole floor with a big, white bath mat.

And then I lived with it. Year after year. I lived with a hideous pink/grey/gold laundry/bathroom. It hurt my eyes every time I had to do laundry.

Here’s what my space look liked a couple of weeks ago. Note the floral wallpaper. Awful. And the accordion door. Awful again. And the drop ceiling. Convenient but awful. And the lighting. Awful.

To be honest, I’ve had a love-hate relationship with this space. It’s been great to have a finished laundry space and extra bathroom for guests. It’s also been really enjoyable for me to see people’s reactions when I show them this space. Easy entertainment. On the other hand, though, the wallpaper and floor combo has always made my eyes hurt. And I hate not having a big laundry sink. A little vanity just doesn’t cut it for my needs.

While I did hire tradespeople for this makeover, my DIY-loving self could not leave it to them to have all the fun. I spent about two weekends in demolition mode. We took everything back to the studs, so that I could have a blank slate.

The space is small, but the makeover is going to be mighty!

Here’s what the space looked like post-demo day:

I know it’s not pretty and tidy, but I actually like this part of the reno process. I like to see all the pipes exposed, to see how things were originally set up, and to think about ways to make things better.

I know the tradespeople I have hired are going to make it better than ever before. On the technical side, new electrical and new plumbing is being installed. I also said goodbye to the awful accordion door, and my framer installed a fabulous pocket door. Things are already looking bright.

As for my design plan?

I’m going with this marble-like ceramic hex tile on the floor:  this classic 4×12 subway tile on the walls:

this quartz counter on the cabinet:

this Blanco Urbena faucet on the sink:

My crew is also going to do some more reframing and add a heated floor. Hello luxury!

My custom cabinet is ready for pick-up, and my Blanco sink is going to look gorgeous on top of it. I have settled on a shower trim kit (finally…after buying and returning a couple). My original design plan continues to guide me, but I have had to make changes to it. Overall, my space’s design could be described as “a massive dose of white with a touch of grey”.

Thanks for following along my first One Room Challenge! If there’s anything specific you’d like to see or learn, let me know in the comments.