Uptown: Door Knobs

Way back in July when I took possession of my new home, I had thought that one of the quickest changes I was going to make was to change the door knobs. I could have taken an easy way out and just replaced the actual key lock part of the knob but the existing knobs were old and so I thought it would be wise (and straightforward) to replace them completely.
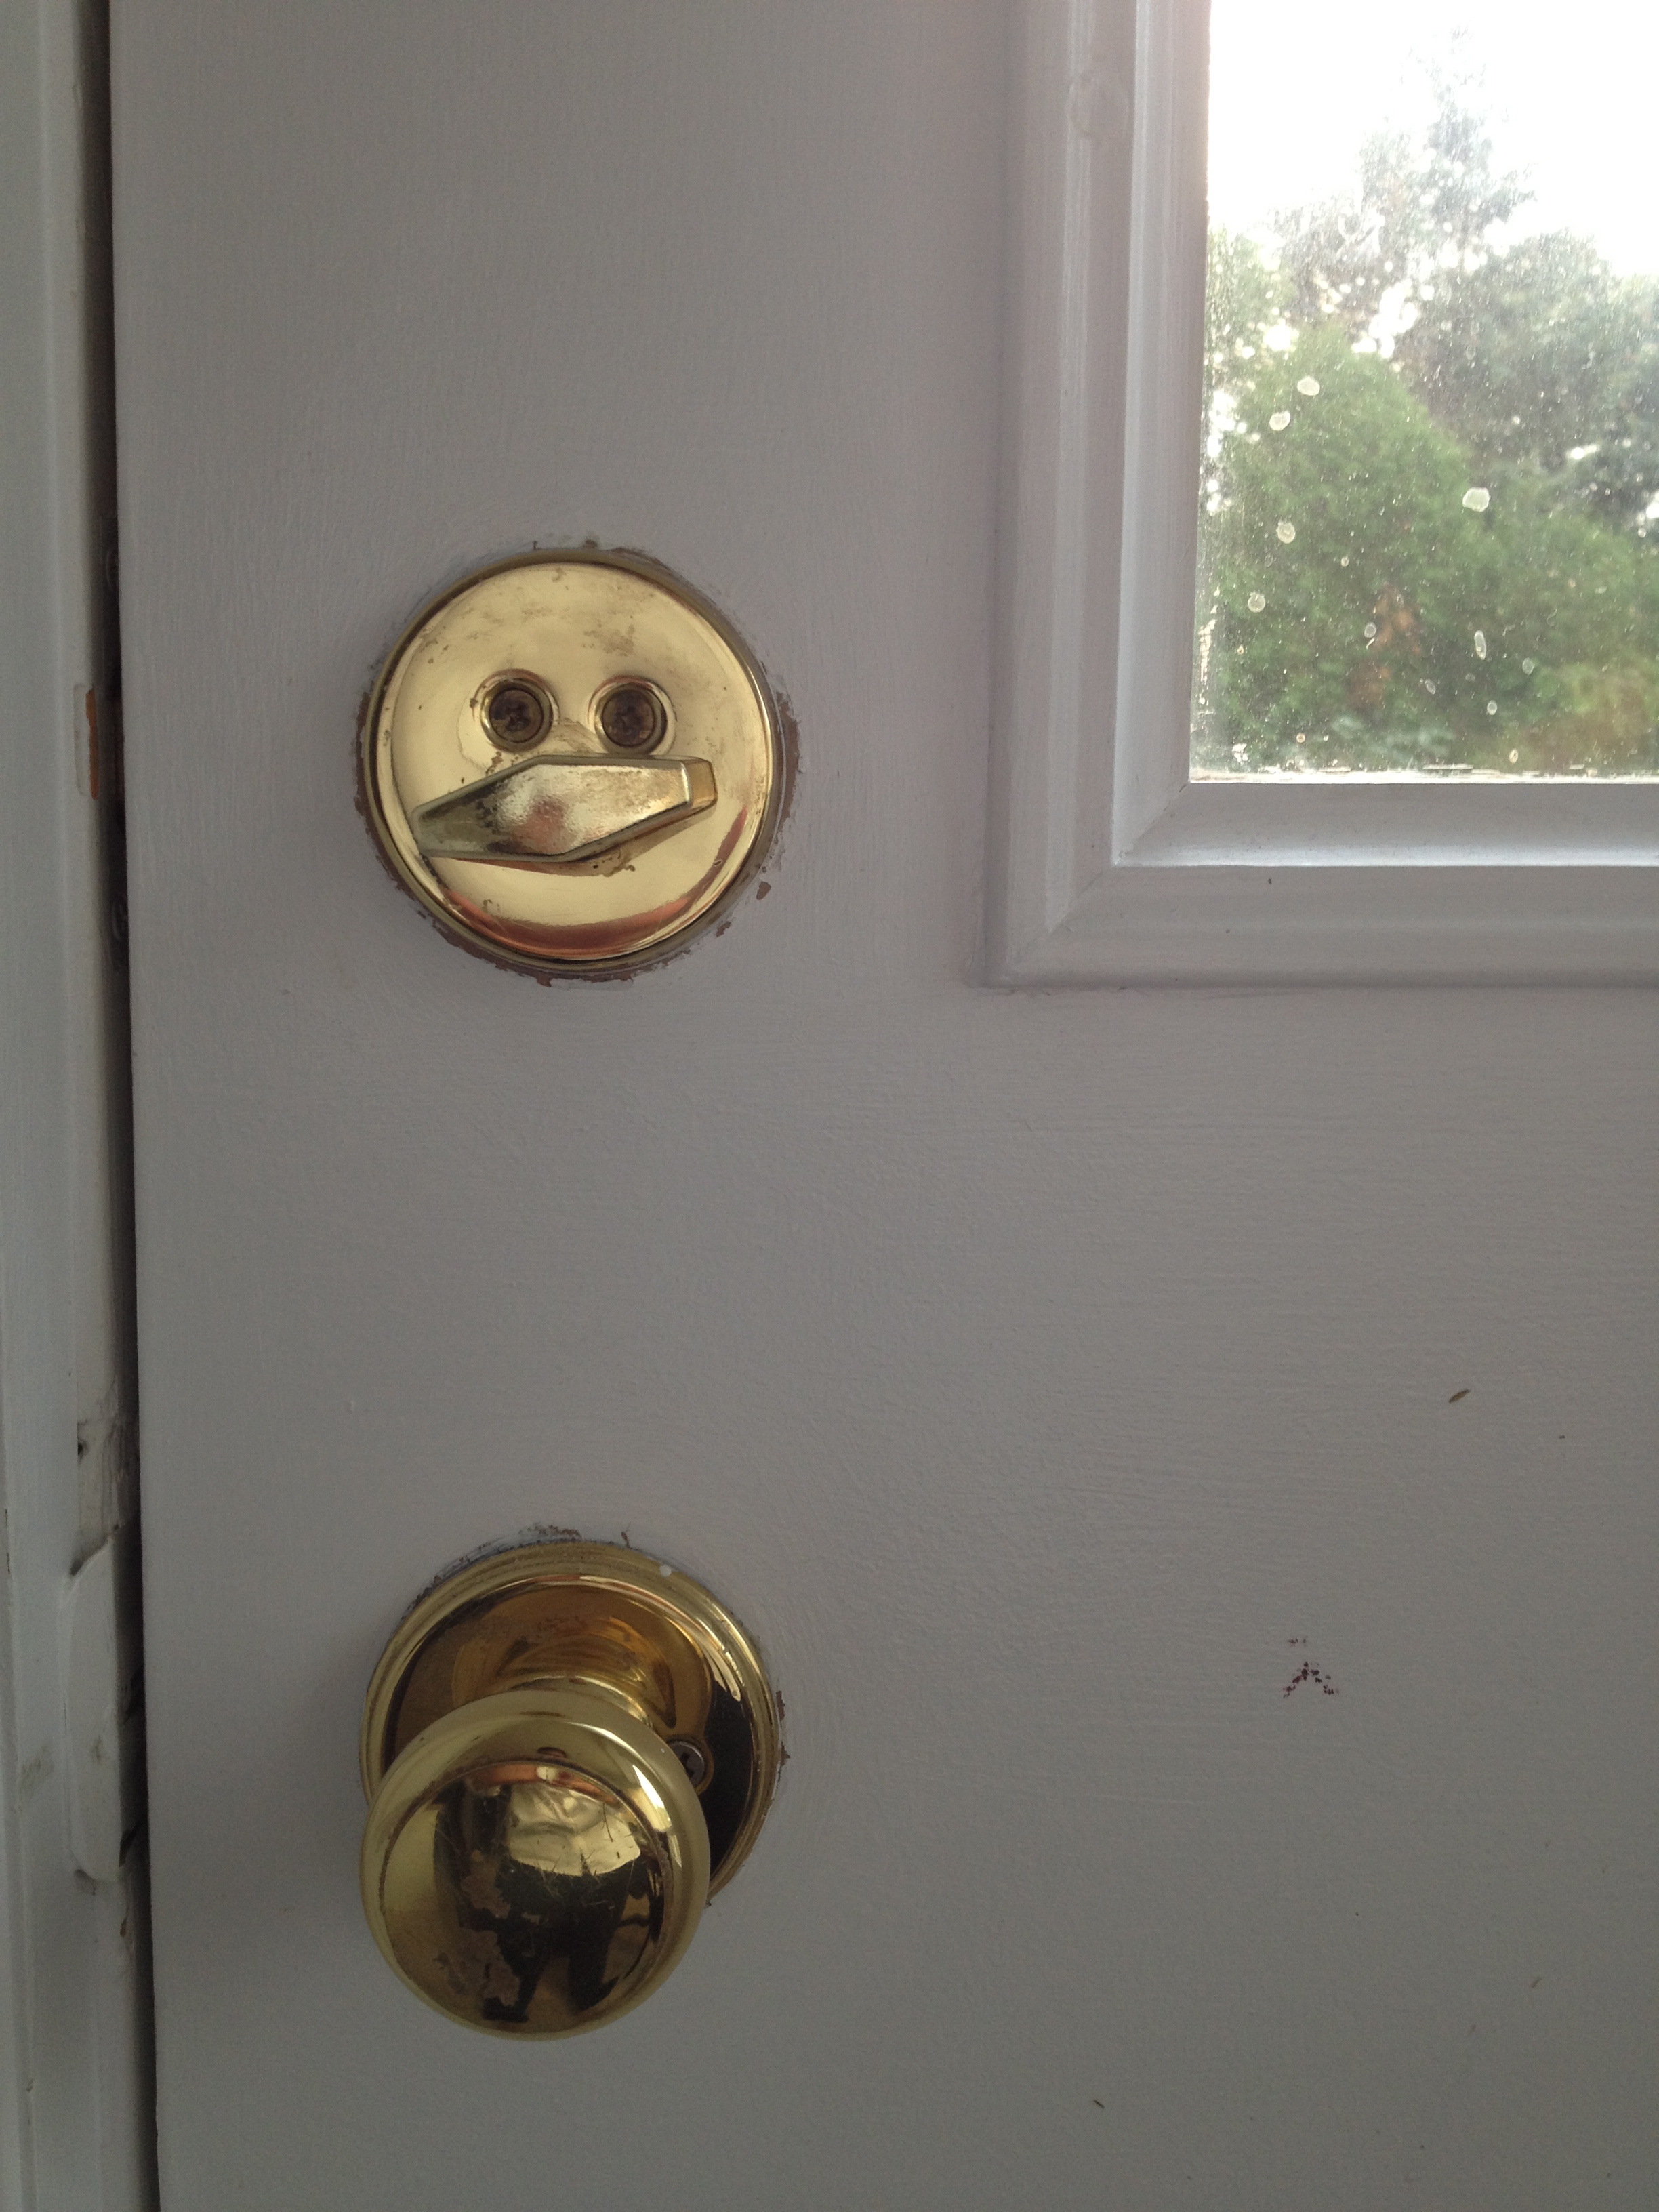
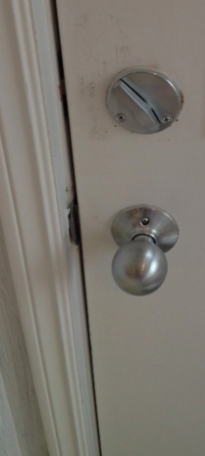
door-knob-5

old knobs

The task started off quite well. I used the measuring guide on the Direct Door Hardware website and the kind people over at Direct Door Hardware sent over some simple, stainless Schlage knobs and matching locks.door-knob-1

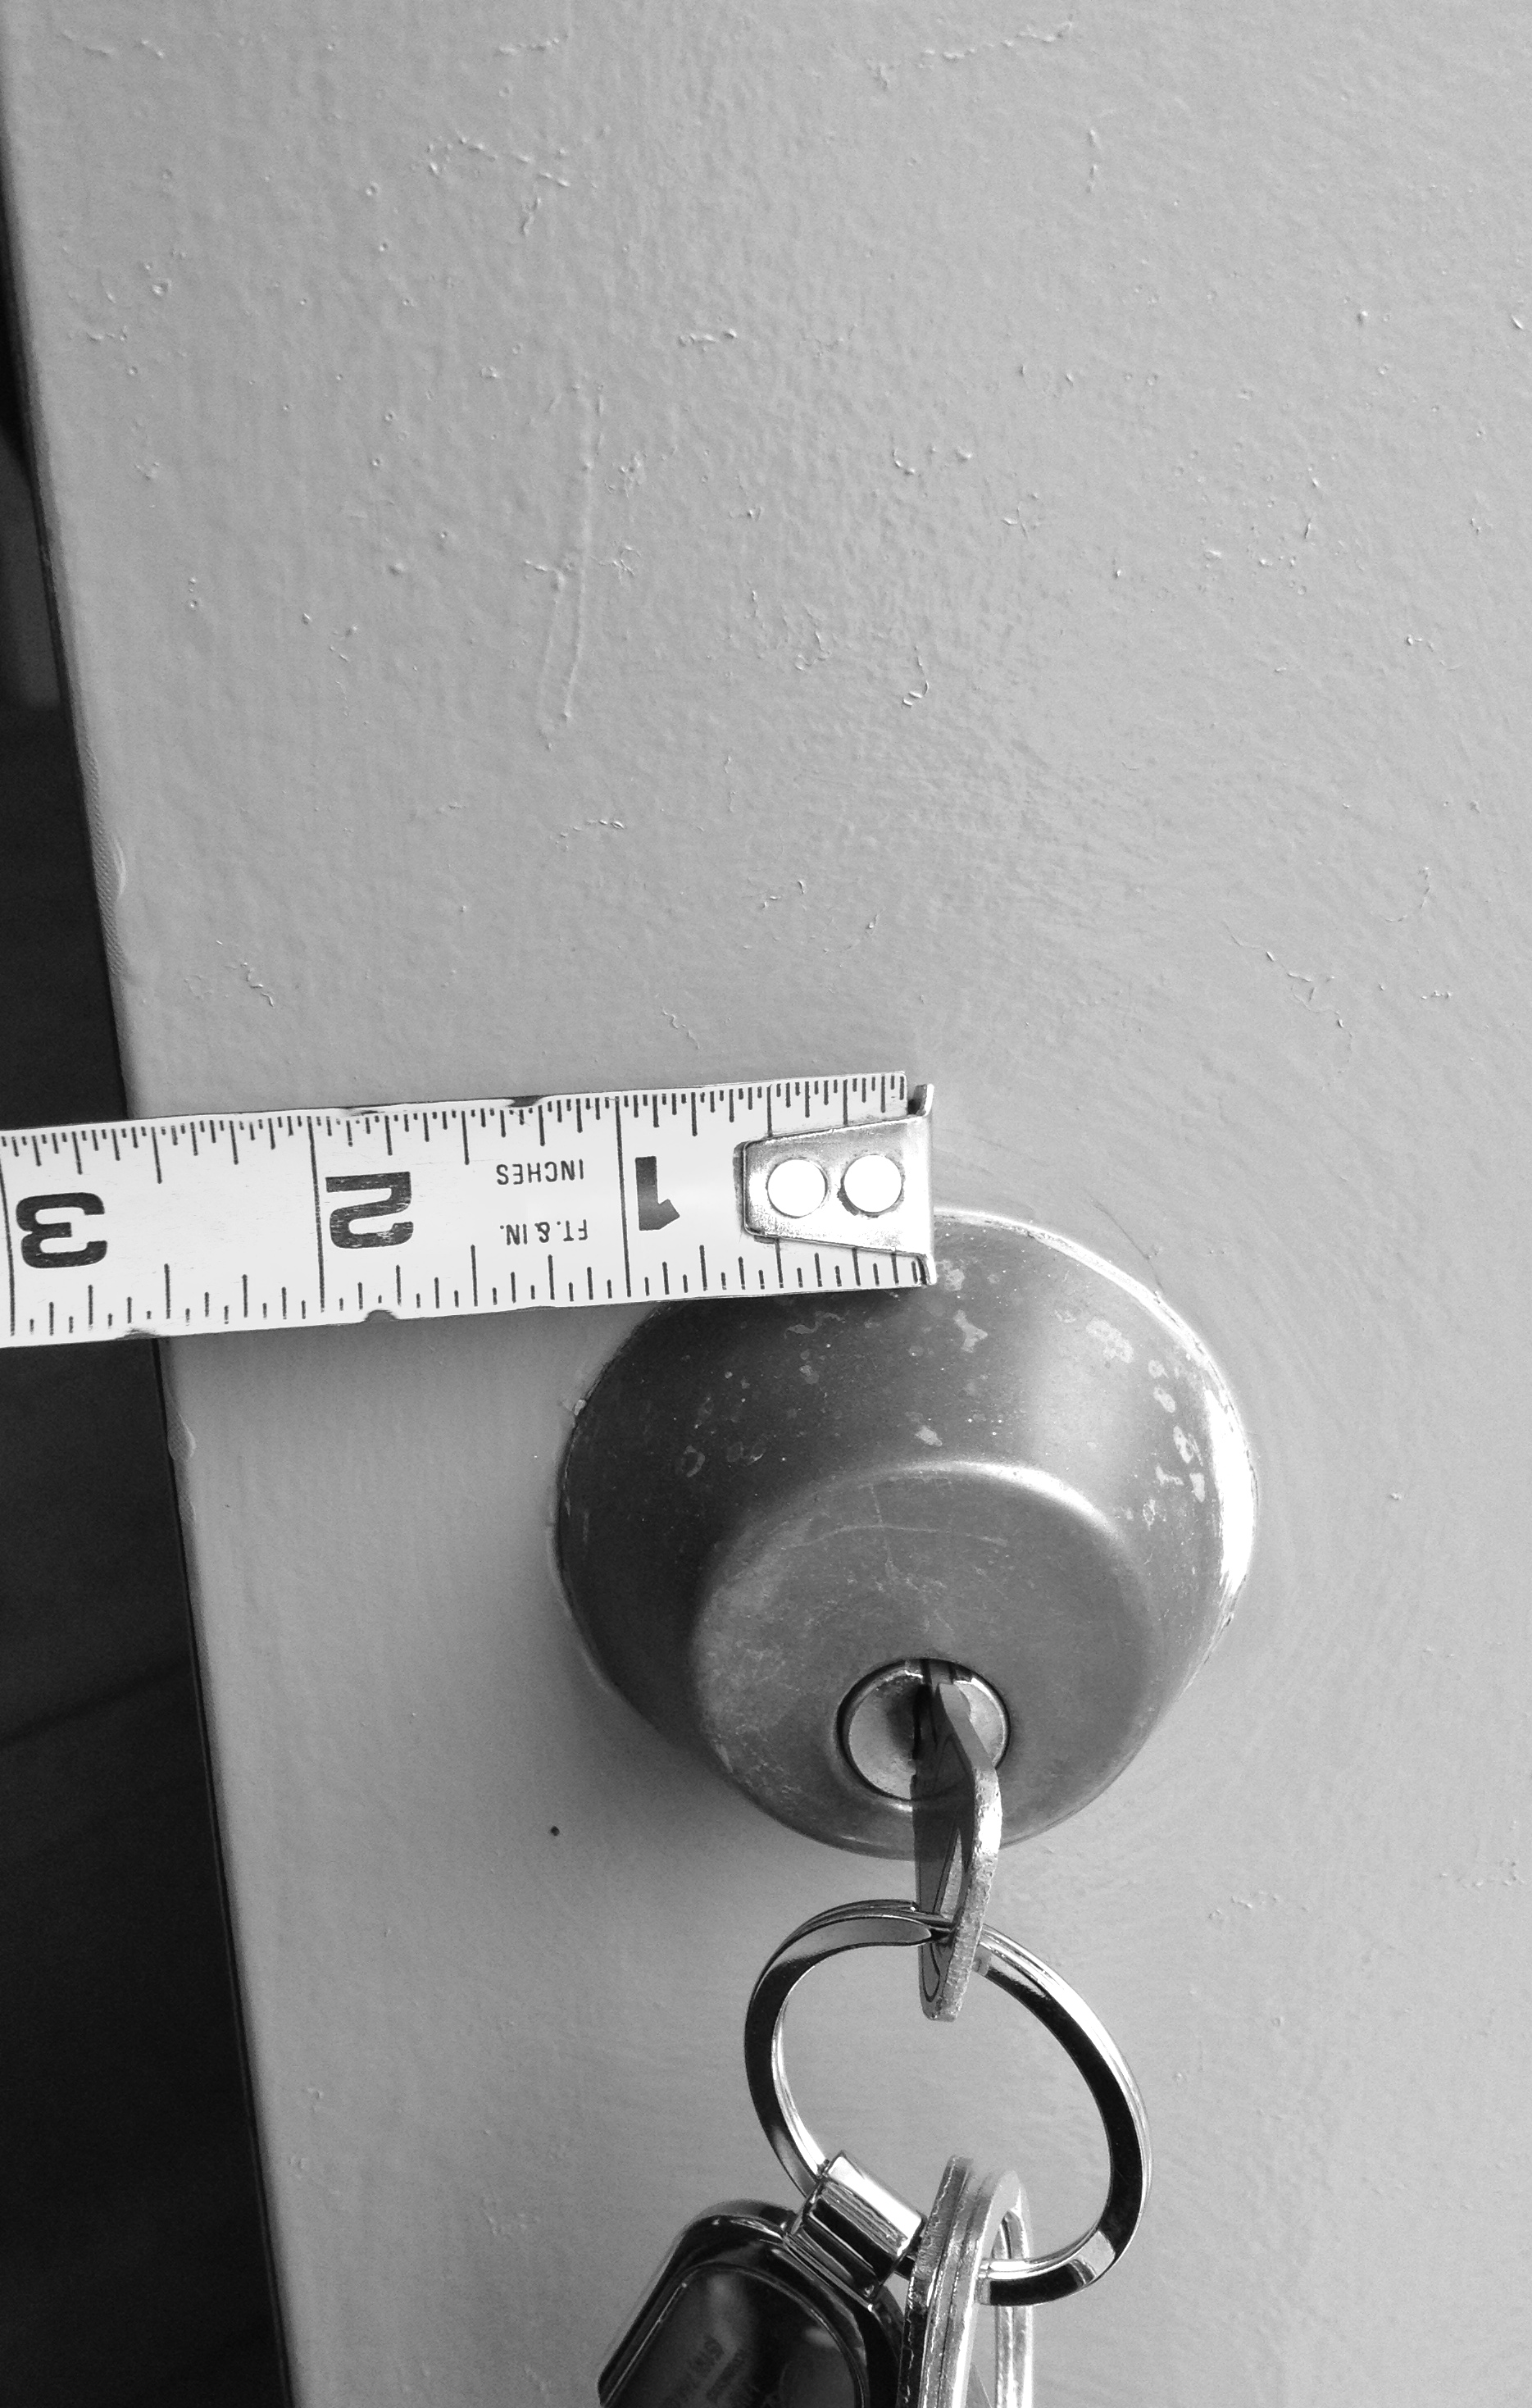
 determining the backset

door-knob-3

the new Schlage knob & deadbolt

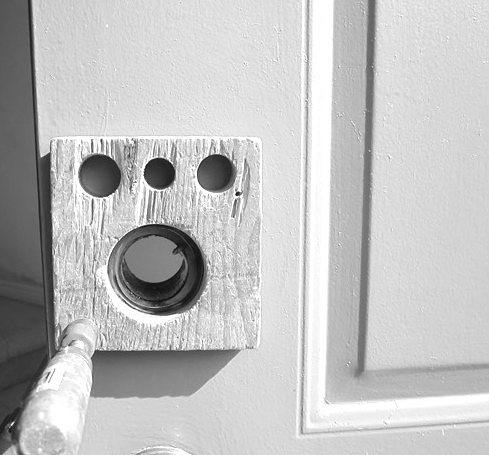
I thought the job was going to take half an hour (tops!). My dad and I took out the old knobs in one of the doors and that’s when we realized that the new Schlage sets would not fit because the bore hole in my door was too small for the lock sets (didn’t think to measure that before I ordered the locks). This was the case for all the doors. I was pretty disappointed. After a bit of research I learned that it would be unlikely to find high quality locks to fit the small bore holes. Plus, I really wanted to use the new stainless sets.
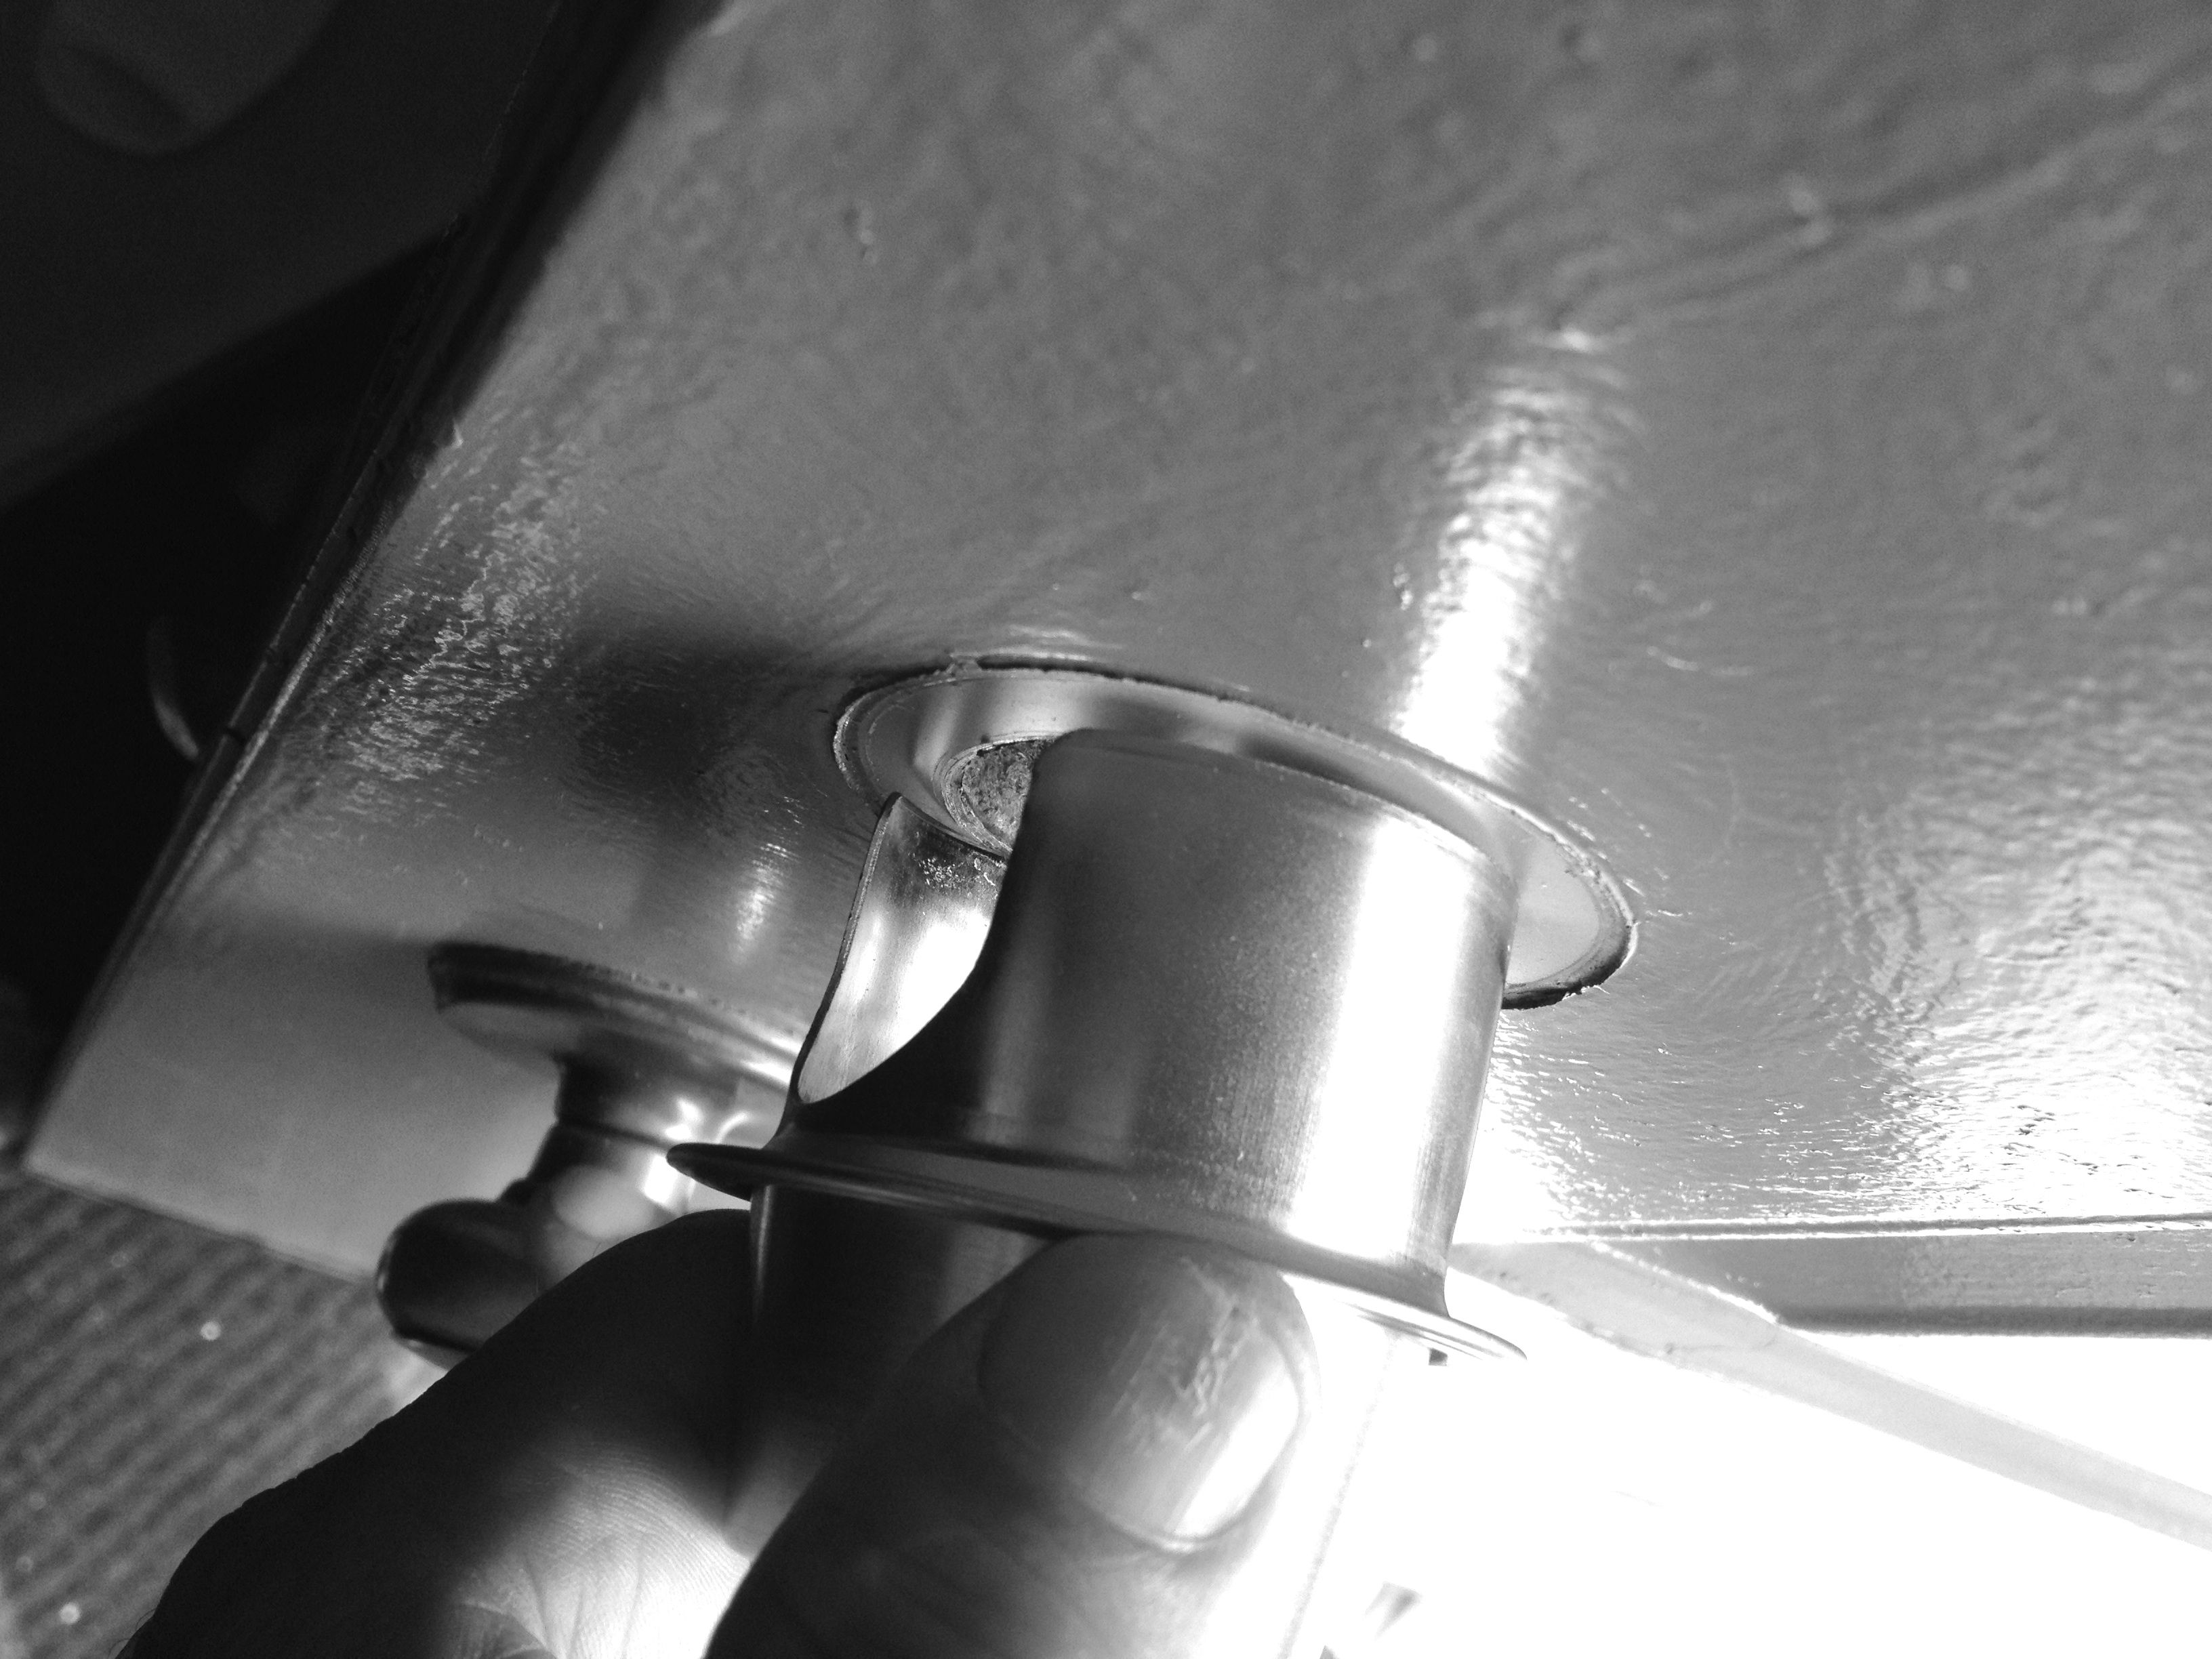
door-knob-4

oops…too small!

I went back to the Direct Door Hardware people for advice (thanks Jake E.!) and thought about my options. I was reluctant to let the knobs go to waste so I decided to hire a locksmith to cut new bore holes in all my doors. I didn’t tackle this task on my own as, in addition to having metal doors, I didn’t have the appropriate tools, and I was too impatient to try measuring anything out by myself. It’s good to admit when you need help, right? Something like that.

door-knob-6

the locksmith’s high-tech tool

doorknob1

new knobs (pre-paint)
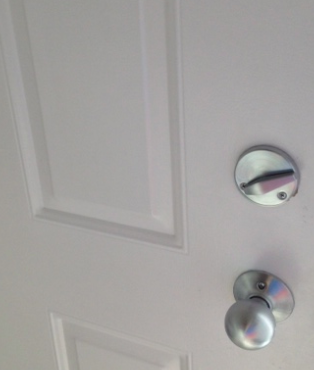
doorknob2new knobs & locks

Anyway. I’m happy to report that the door knobs and locks are in throughout my house and they are working out perfectly. I’m happy with the strength and simplicity of the set I ordered, and the service at Direct Door Hardware was quick and informative. I’m also happy that I decided to hire the locksmith to get the bore holes to a standard size. This will give me more flexibility later on if I decide to install another new set.

Uptown: Grouting Tiles

I’m pleased to announce that I have now completed the tile work in my powder room. I ordered the grout – smoke grey – from Twin City Tile and grouted the floor over the Thanksgiving long weekend. I am SO incredibly pleased with the floor and I am SO glad I decided to rip out the vinyl.

White-Cabana-powder-room-hex-tile

Grouting was easier than laying the tiles down. I was certainly less stressed about this part of the process. How did I get the job done? I followed the directions on the grout package as well as the instruction I received from the Home Depot tiling workshop I attended and the mini lesson I received from Silvano at Twin City Tile. I mixed the grout powder with water and stirred it all up (with a paint stick – it was a small batch so this was good enough) so it had the consistency of pudding or icing (tiling and grouting is just like icing a cake!). I used the spatula (grout spreader) and moved the grout into the spaces like I’ve seen on TV (honestly!). I let the grout dry for about 10-15 minutes and then spent quite a bit of time (over an hour maybe) cleaning the tiles very carefully. I knew I couldn’t leave any grout residue on the tiles otherwise my floor would be ruined. I spent so much time wiping the grout off with a damp sponge just as I had been taught (one direction, rinse the sponge after each wipe, etc.). It was time consuming but very satisfying. I then let the grout dry for a few days (I think it only needed 24 hours) before I actually stepped on the floor.

The room is almost done. Since the last powder room progress update I bought a new toilet (dual flush – so fancy) and a new mirror. I (and my handy parents) now just need to…

– sand the walls
– prime the walls
– paint the walls
– buy baseboards
– install baseboards
– install vanity (this one)
– install faucet (this one)
– install toilet
– install light fixture
– install mirror (from here)

And then the room will be ready for a big reveal!

Uptown: Powder Room Update

When I moved into my house, my plan for the powder room was to rip off the wallpaper and install a new faucet. Well, plans change.

IMG_5192_2

 powder room before

The powder room is now getting a full makeover. Oh, how I love a good makeover story! Progress has been slow but steady and I am really enjoying the full reno experience (minus the mess and constant clean up). To begin this makeover, I spent several evenings ripping down the wallpaper. Then I spent several more evenings (and weekends) scraping wallpaper glue from the walls.

IMG_5451

powder room – progress – wallpaper removed

It didn’t take me long to decide that I wanted a new vanity so at this point I handed the room off to my dad who, in addition to patching up a whole bunch of holes (thank you so much wallpaper glue) and rearranging the light source, removed the vanity and toilet. Once the room was empty, I decided that the vinyl flooring had to go so I ripped it out one Friday evening. I ripped it out without really planning what was going to come next but I was encouraged by a chat with Tia and a visit to Twin City Tile.

IMG_6226

 powder room – ripping out the vinyl floor

In between all of the destruction, I bought a new sink and vanity. I placed a tile order with Twin City Tile feeling only half-way confident that I could actually install a new floor by myself. After a mini-lesson from Silvano, I realized that I would need to install a new sheet of plywood over the subfloor in order to ensure a smooth installation of the new tiles. My dad and I cut a piece of plywood to size and the difference it made was pretty impressive. With the new flat floor in place, I went ahead and planned out the tile placement. I started with finding the centre point in the room and drawing lines to help line up my sheets of hex tile.

IMG_6270

 powder room – new subfloor ready to be screwed down

IMG_6284

 planning for the new tile floor

Over the period of 4 hours, I managed to dry-fit my tiles in the space, figure out how to mix adhesive to the correct consistency (not too soupy), and installed my tiles. I’m SO happy with the progress I made and I am incredibly proud that I managed to lay my first ever tile floor*.

IMG_6292top view of the powder room – new tile floor is secure!

I haven’t grouted yet. I’m going to try and get to it this week or upcoming weekend. I am leaning towards a grey grout. Then I’m going to build my vanity and figure out how to do plumbing**.

* Thanks to Silvano at Twin City Tile for a mini lesson, the Home Depot for offering a free backsplash installation workshop, and for the blogging community for documenting the tile installation process. I’ve learned so much from you all! 

**I’ll likely leave the plumbing up to my dad. We’ll see.

Uptown: Saying Goodbye to Vinyl

…and a whole bunch of other things around the house!

Things have progressed chez moi. Things are also slow going. While I can do without the mess and chaos, I’m loving the reno. It’s so satisfying to see things getting done the way that I want them. My dad has been helping out a lot and my mom will soon be joining the efforts (I’m putting their retirement to good use).

Here’s what’s been happening…

1. My dad removed the vanity and toilet from the powder room. The nice people at the Home Depot taught us about compression valves and we gave them a try. They’re great so far. I may not have a working faucet in this bathroom but the valves are shiny and clean.

White-Cabana-Uptown-2

2. On Friday night I decided to rip out the vinyl in the powder room. Took the baseboards right out as well using a spatula and a crowbar. I probably didn’t need the crowbar but it was awesome. I love tools!

White-Cabana-Uptown-5

3. Before I ripped out the floor, I visited a tile shop. The photo shows some of the tiles that I’m considering. But I think I decided to go for the 1″ white matte hex tiles. It’s going to look great! I’m going to try to tackle the floor in the next week or so. Wish me luck!

White-Cabana-Uptown-3

4. Dad has been doing a lot of electrical work around the house. In addition to moving ceiling and lights, he has started to replace the light switches. The square version instantly modernizes a room. The effect is really surprising (to me, at least).

White-Cabana-Uptown-1

5. I finished painting my bedroom a couple of weeks ago. At the moment, the ironing board is a feature in the room – I’m working on changing that! I am very happy with Chantilly Lace.

White-Cabana-Uptown-4

And that’s about it for now. More to come soon. Happy Friday!

*Due to a computer server issue, the original post vanished. I have rewritten this post.

20 Below: Dap Caulking

Little did I know that a few months after taking this photo of rows of DAP caulking I’d be loading up my shopping cart with it. That’s what a reno will do – it’ll force you to learn about things like caulking.

DAP

DAP Caulking, $2.88

I am looking forward to meeting the DAP at BlogPodium this upcoming weekend. Thanks in advance to DAP for sponsoring the event.